• Gallery
    • Fire
    • Ice
    • Water
    • Kelp
  • Thoughts
  • Resources
    • Custom Styles
    • Favorites
  • About
  • Contact
    • Schedule a Meeting
  • Gallery
    • Fire
    • Ice
    • Water
    • Kelp
  • Thoughts
  • Resources
    • Custom Styles
    • Favorites
  • About
  • Contact
    • Schedule a Meeting

Author Archives: Spicyjello

April 2, 2019

| by Spicyjello

Love, Engagement, and an Umbrella

Posted in Inspirtion, Technique

Fortune favors the prepared mind – Louis Pasteur.

Although I can’t necessarily impart all of the experience that helped prepare me for this shoot and the resulting image, I can share the philosophy behind it and some practical advice.

Preperation

There was a chance for rain on the day of one of my recent engagement shoots. I have shot in the rain many times and my Nikon D850 and Nikon Z7 are very well suited for any weather I might encounter. Knowing that the cameras are ok getting wet but the strobes not so much, I grabbed a few small wash clothes just in case I needed them.

Brief side tangent: I never use plastic to protect my gear. Plastic will either funnel the water where I don’t want it or allows a small collection of water to form that goes in the wrong direction when I remove the plastic. This is why I like something absorbent like a washcloth.

I also knew that my bride, Devyn, was bringing an umbrella just in case. Everything was ready—Que the rain!

Keep an eye out

Throughout the shoot, I constantly looked around to see what the light was doing to mentally prepare for the next image. I noticed that the clouds to the east were getting very dark and the temperature was dropping. As we finished and began walking back to the car, I took another look around and saw that the sunset had the potential to be amazing.

A little tip on sunsets

I say “potential” because it was dark and gloomy at the moment, but it’s wise to never give up on a sunset too soon.

If you leave before the sunset, you have no chance of seeing a good one. Obvious, I know, but I see people leave all the time just before or immediately after the sun has dipped below the visual horizon. The best time to capture a sunset, especially if there are clouds, is about 5-15 minutes after the actual sunset. During this time the sun itself is blocked from our view but may still illuminate the underneath side of any clouds. So be patient and keep an eye out.

If you want to take the extra step, I recommend get yourself an app like PhotoPills or Sunseeker to help keep track of the exact time and location of the sunset.

The capture

I noticed that the sunset was getting better and better and I remembered the umbrella that Devyn brought—It’s time to make an image! Without the rain, I thought it would be cute to have my couple silhouetted against the sunset with a backlight to create separation. I love silhouettes against a sunset. I imagined the scene as a couple sitting together taking in the majesty of nature happening around them. I wanted to keep it simple, as anything more for me kills the mood and feels unnatural.

I had my groom, Cameron, hold a strobe with a warming gel to give them a little “pop”. Just as I started taking images it began to softly rain—Perfect timing.

Why I chose a strobe

I could have used a LED light, but with a strobe, I had control over ambient and strobe lighting levels separately. Also, if I used a LED light, it would have been much harder to underexposed the sky just one stop to help increase separation for the silhouette and improve color saturation. I use the Nikon SB-5000 as TTL controlled lighting. Any system can do the job, of course, but what I like best is the ability to control the strobe power remotely.

Thanks to being prepared and a fantastic couple willing to stay a little longer and get a bit wet, we had a great experience and awesome images to go along with it. Ten minutes after we started the shot, the sunset was done and I had the images I hoped for. This quick turnaround was a great reminder of how important it is to “know your gear”. Master your gear so it is never in your way and you can create without the hesitation. A moment like this so much easier and more likely to be successful when I can think more about what I want and let my muscle memory take over from there.

Watch the post-process

When it comes down to it, capturing the image is only the first half of my vision, and often times, working with changing light rarely affords the “perfect” in-camera image. You can see how I tuned this moment into the image I had envisioned in the video below from my Spicyjello YouTube channel.


This post contains affiliate links. If you’d like to learn more, see my affiliate disclaimer here.

March 16, 2019

| by Spicyjello

Visualize the Masterpiece

Posted in Inspirtion, Software, Technique

Understanding what you can accomplish with post-processing can make all the difference in your images

Looking at the featured image of this post (above), the image on the right was straight out of camera, and obviously, the image on the left was “tuned”. A side-by-side view is a testament to the amount of information that is contained in a RAW file and is something to keep in mind while processing. In this instance, the processed image is a more accurate rendition of the scene and best represents the way I experienced it.

So why the difference? Why not get the image perfect in camera?

When looking at any RAW file, keep in mind that what you see on your computer monitor is a visual translation representing only a small amount of data available in the file for viewing. RAW files contain an enormous amount of data that, for the most part, we never see unless we move a slider.

The image on the back of your camera is much the same. An engineer worked out for you, how “Faithful,” “Normal”, “Landscape”, or other profiles are supposed to look. The amount of saturation, sharpness, contrast, and other visual elements you see are nothing more than a single, narrow interpretation of your image. Until you get that image into a RAW editor like Capture One, Lightroom, Luminar, and so on, you’ll never see the depths of what that image contains.

In practice

For the image above, I chose to set my Nikon profiles to neutral so that I could see as much information in the highlights and shadows as possible. At the end of the day, I’m not interested in a pretty image on my camera display; it’s useless for the most part. Once that image hits my computer it doesn’t look the same as my camera preview anyway. Unless you are using the camera manufacture’s RAW editing software, almost nothing about the in-camera profiles or styles set in the camera will translate to the computer. For the most part, when bringing an image into your RAW editing workflow, you lose all of the color styles and keep exposure and white balance. From there, the look of your image is up to you. If you do choose to use the manufacture’s software so that your in-camera styles match the editing software, keep in mind that there is still an enormous amount of data in the image file that goes well beyond on what can be represented visually.

Before you take the shot

Prior to creating an image, take into consideration what your camera is capable of and understand the visual range of your files.

Also, take into account how you will edit your image to tell the story best as you see it. For example, imagine standing on a bridge in Zion National Park as the scene gets darker the sky becomes more beautifully lit. Before composing your image, you’ve already decided that you want to show the sky and the shadow detail of the river below. To get that end result, it’s crucial to understand how to get your image to a place that will more faithfully tell the story as you see it, while at the same time recognizing that the camera can’t see the same as your eyes—Being aware of this can often be the difference between a snapshot or a masterpiece.

Putting in the work

Ansel Adams once spoke about a concept by which you “visualize” the image fully in the mind’s eye before pressing the shutter; a concept that is just as meaningful today as it was when Ansel was shooting large format film in Yosemite nearly 100 years ago. The same discipline applies for Ansel as it does for us regardless of the screen on backs of our cameras. Without looking at the preview on the camera, we need to visualize the image fully in our minds with consideration to the process of how we edit, print and display our image.

Visualizing the final image before capture is a skill and discipline that takes time and practice. The more you exercise your mind, the easier previsualization will become. To help with this, know your gear and what your files are capable of. Don’t trust a podcast or technical article to tell you how good your gear is. Go do some tests for yourself. Photograph in the shade and try to predict what the image will look like before looking at the back of your camera. Intentially over and underexpose a series of images and try to recover any lost data in your RAW editor of chose. See what your camera is capable of, as not all cameras are created equal; some have less overexposure latitude while others reveal more noise if the shadows are opened too much. The software you use plays a huge factor as well. Take into account the enormous variety of cameras, sensors, and software—You have an unlimited array of possibilities for any image.

The full progression of the image

Shot on the Nikon Z7 and edited with Capture One Pro 12


RAW out of camera


I cropped and Increased over all exposure, saturation and recover some highlights.


I darken the sky with a linear gradent. Also increased saturation and black point slightly.


Using the local adjustment tool. I lightned and increases the clarity of the water and The Watchman.


This is my final adjustment:
I used the brush tool to darken upper corners and the land next to the stream.


The results

For my Zion image of the Watchman above, I knew that as long as I didn’t overexpose the sky and kept even the slightest detail in the shadows, I had all of the info I needed. As I was pressed the shutter button, I knew just how I wanted to edit the image.

Like most skills in photography, the more you shoot and visualize your final image, the easier the process will become. At some point, visualizing will become second nature and you won’t think of it much anymore. You will simply shoot with a scene in mind and later, while editing, you will see the image as it should be and make it so.

Here is an interesting link with Ansel Adams speaking about the idea of visualizing.


This post contains affiliate links. If you’d like to learn more, see my affiliate disclaimer here.

Zion

February 12, 2019

| by Spicyjello

From Brides to Post-Apocalyptic

Posted in creativity, Inspirtion

As a creative and full-time wedding photographer, I spend a significant amount of time creating. It’s not always in the real world, but nonetheless, my mind is always looking for inspiration and resources for the next image or “thing” I want to build.

With my day to day often consisting of emails, phone calls, and other distractions, I seem to “feed the artist” less than I would like. So when I’m part of a photography group (IEPPV) and am tasked with helping organize a “Post Apocalyptic” model shoot in the desert, you can bet my inner creative gets very excited.

My job was to find the best location to make this shoot fun for both the models and attending photographers. The Salton Sea is a little over two hours away from me, and a place I try to visit often. It really is the most beautiful and desolate place I know. I love the starkness of it. When first-timers come to the Salton Sea, they are usually greeted with a wonderful stench and a lot of dirt and dust. Despite the day’s rain, mud, and only mild odor, it was a perfect location!

In addition to getting to revisit the Salton Sea, I was looking forward to photographing a set of humans I don’t regularly get to put in front of my camera—Post Apocalyptic models! On top of being fantastic performers, the models we had were such cool humans. It’s not an easy job to be thrown at a group of image-hungry photographers and remain so enthusiastic. I want to thank all our models and the groups to which they belong for coming out and playing with us.

Sarah and Brita making it look easy. Costumes provided by The Ciccarellis

The reason a shoot like this matters to me as much as it does is that I get to play. I get to experiment and test new ideas. I get to step outside of the world that I know so well, and in turn, force myself to see differently and work with different tools. It’s absolutely wonderful, and I find it essential for me to maintain my creativity.

Pushing your creativity

I’ve had many conversations with other photographs about “why should they want to shoot models when they are landscape photographers”, or “what’s the point of learning macro and focus stacking if they only shoot sports”. In short, I believe studying all disciplines of photography will give us skills that can be used in any other photographic discipline.

For example, focus stacking works great for macro, landscape, and commercial. Also, as a portrait photographer, I never saw the need to better my landscape photography until someone helped me see—All my landscapes at the time were focused 1/3rd of the way into the scene and shot with a very shallow depth of field as if there was a person in my plane of focus. It sounds silly now that I write it out, but that’s all I knew. Once I learned to capture the entire scene, I realized I could place a person into the landscape, and as a result, have a more unique image featuring the scenery and the added subject. It’s a Win-Win. So in the end, learning to shoot landscapes helped me be a better wedding and portrait photographer.

Monique & Blake

Turning the tables

Brides wear dresses, veils, and don’t tend to move fast, while post-apocalyptic models have swords, clubs, and other cool toys that shoot fire while riding around on a 2-wheeled machine driven by a snowmobile in the desert—Two very different creative opportunities. The challenge of being presented with something totally different is that the methods of posing and lighting that you’re used to won’t always work. This forced me to take a step back and think about my surroundings more, looking for the direction of light and how it enhances or detracts from the costumes. Also, I had to consider what lens would tell the best story. Anyone that shoots regularly usually has a tendency to fall into a routine and risk becoming mundane. Shooting something completely different from our norm helps promote the thought process that leads to new ideas. I’m pretty solid at posing a bride with a bouquet and managing a veil, but when I have a model sporting a shotgun, bullet belts, a sword, and hair that would make any 80’s hair band jealous, it’s a whole new challenge and I love it.

I try to really embrace the challenges that force me to stop and solve a new lighting situation or pose someone on a pile of concrete. The new and unfamiliar environment is just familiar enough that my set of skills can get me the shot I want, yet I’m still required to think out each step rather than rely on muscle memory. This is when the magic happens: Initially, my brain doesn’t know what to do with the new scenario, but after a moment or two I begin to go through my toolbox of what I know. Suddenly an idea comes, so I pre-visualize the shot and begin to calculate the route needed to make the image. This is when I push my regular skill set and require myself to work off intention rather than instinct.

Sarah and Brita. Costumes provided by The Ciccarellis

Light is light

Ultimately, I see this experience as an exercise for my creative muscles. If we don’t push and challenge ourselves, we can’t grow in the same way. Whether I am photographing a landscape, fire, brides, or models in the desert, I will always have an opportunity to learn and add to my photographic bag of tricks.

Regardless of what we are photographing, light is light. Light scraping across a mountain range at sunset revealing the texture and depth of the canyons behaves the same as an off-camera strobe positioned to scrape light across chainmail or the subtle beading of a wedding dress—Quality light matters regardless of the subject. You can use a handheld reflector in the studio or position your subject outdoors to benefit for light striking the side of a light colored building. Shadows from trees or building are just gobos in nature.

Feylan

At the end of the day

Regardless of your skill level or what type of photographer you identify as, saturate yourself in other disciplines of photography. As a portrait artist, you may not think there is anything to learn from landscapes, but I would suggest that you’re missing out on a valuable set of skills. Having the ability to read a vast area of light, shapes, and lines and knowing where to place a subject can be a game changer. The same goes for you landscape shooters—Learning to shoot in a studio with 100% control over your lighting and the opportunity to experiment with lighting types/direction could offer an edge when planning a location.

Understanding how light falls on an object, whether it’s a person, a mountain or even the moon, could be the difference between a simple image or an extraordinary one. Take a leap and learn a different skill, and at the same time, teach someone yours.

IEPPVSalton Sea

February 6, 2019

| by Spicyjello

Embracing Tough Lessons

Posted in creativity, Inspirtion
Fisherman on Dillon Beach

Sometime in 1995, I attended a workshop with a portrait photographer named David Peters. He is a fantastic portrait artist and taught me that the people I was photographing were more important than the gear used to create the images. Throughout his workshop, we worked to create images that conveyed emotions and told a story of love and connection between our subjects. We were never distracted by looking at the backs of our camera to see if we got the shot—We instead trusted our skills and turned our attention to our clients.

Yes, I rocked the mullet and needed a tripod for that beast of a camera.

The first turning point

At that time in my career, I was shooting film with a Hasselblad 500cm. The Hasselblad was a fantastic camera, and although fully manual, I found it easy to work with. At that time, I used a huge Quantum Q-Flash for every shot. This flash was huge and required a separate battery pack. No speedlites with TTL for me. Outside the studio, David rarely, if ever, used a strobe. Not shooting with strobes took me by surprise since that was all I knew. If you had asked me before the workshop if I thought there was a better way to light, I’m reasonably sure I would have said no. After spending several days shooting without a flash and working with David and other students in the workshop, I decided then and there—No more flash for me unless the lack of available light demanded it.

Now imagine: You’ve just come home from a week-long workshop and in two days you have a big wedding with your photographer wife, and you break the news that you are no longer going to use flash. Oh, the look on her face! To her credit and having spent time at the same workshop, she trusted me. That wedding’s couple, Angie and Ott, are still married today, and I proudly remember that day as the first step to radically improving my photography from that moment on. Not only did I learn a new technique, but I was also humbled to realize that I didn’t know as much as I thought I had. From that point on, I never wanted to feel as if I was behind on my education again. I haven’t spoken to David in many years, but I will always be grateful to him for helping put me on the path I’m on today.

Who moved my cheese?

In 2008 the market took a significant turn for the worst. The tech bubble popped and the Dow made its 3rd largest drop in history losing 778 points. For me and my business, this was hard not only to see some retirement investment take a hit, but it was a low year for booking weddings as well. Up to this point my wedding business, Imagery Concepts, had been growing year after year with no paid advertising—Just good old word of mouth. In the years leading up to 2008, we averaged 30 weddings a year and were considered expensive in our area. We were doing great, and until the crash, we had no real worries about future bookings.

In contrast, we did 16 weddings in 2008 and didn’t do much better in 2009. We figured it was the market and all we needed to do was be patient and wait it out. I was very wrong. As I got more worried I started talking to my vendor friends, like DJ’s, event coordinators, and other photographers. For the most part, we all felt the same way. There were a handful of people, however, whose businesses had continued to grow throughout all the market drama. I was shocked and more than a little upset at myself for being so complacent. It turns out that, yes, my industry was affected by the market, but the brides had not left—The market and how I reached them had merely shifted. My cheese had been moved. If that reference doesn’t make sense, check out the book “Who Moved My Cheese?” by Dr. Spence Johnson. A great little book about how we get too comfortable while the world changes around us without us noticing the trials and tribulations that often follow.

Once I realized that, although the market did create a shift in my business, it was me that was ultimately responsible for the decline in business. I immediately got to work on how to regain the ground I had lost. I learned that to stabilize my business and gain year to year success, I needed to diversify my offerings. I still needed to do weddings but also the maternity and the families that followed. In addition, I dabbled in commercial, worked on a stronger website, and built more effective marketing materials. Since 2008, I have taken better control and direction of my business avoiding many of the industry ups and downs.

Shot from a 2008 wedding at Kimberly Crest in Redlands, CA. Daniel and Audrey are still very happily married with two amazing kids.

A punch in the gut

I’ll admit that in 2010 after the recovery from 2008, I was not ready for any more slaps upside the head, but then again, whoever is?

I attended a wedding convention in Las Vegas that I had been to before but never really engaged. WPPI (Wedding & Portrait Photography International) is a massive event with significant learning and socializing opportunities. This time I was ready to dive in, learn, and meet some new people. I spent several days watching speakers and attending workshops.

By this time in our career, my wife and I had been shooting weddings full-time for 18 years, and there wasn’t a lot of new or revolutionary content at the show that piqued our interest. I was not expecting, though, to see the WPPI image competition images on display. I can only describe what I saw as a punch in the gut.

I’m a full time working pro, I thought.

I make a great living shooting weddings and my brides are excited to see the work I have created for them.

I started in film, transitioned to digital, and my work only got better. I’m good. I know I am.

How can the images I’m looking at be that much better? Have I been living under a rock?

I’m creative, why didn’t I try that?

I must admit, I was a little more than taken aback by what I saw—Brides underwater, hanging from a helicopter, riding a dirt bike, or sitting in a fairytale style landscape with a castle in the background. Many of the images were composited and many were in places I could never go with a couple on a wedding day. However, what I saw were images of my peers pushing their ideas, skill, and creativity outside what at the time would have been the acceptable client-level imagery. Seeing those images ignited in me the idea that I can be more artistic and take more risks with my work. I felt justified to experiment a little more when the wedding day schedule allowed and push my creative boundaries. In practice, the most fantastic experience happened. My couples loved what I was doing—Another growth moment!

After more than 25 years of shooting full-time for my groceries, I have come to learn that the moment we believe we are either good, learned all we need, or take our eyes off the ball, we are setting ourselves up to fail, and if we are not careful, someone will move our cheese. Competition is a fierce drive, but our own creative desire to be better should drive us even more. It’s a little cliche I know, but it’s so very true. Never stop learning! Never stop growing and never think you have arrived.

Our groom Andre on his wedding day being amazing! This image was featured on the cover of PPA Magazine.

Still growing

I feel the next big growth moment for the creative community will be the management, and often the moderation, of how social media plays into what we create. Social media is terrific for sharing our art but can often be one of the greatest enemies of creativity. Pablo Picasso said, “The chief enemy of creativity is good sense”. I would add that chasing followers and “likes” can be even more destructive and certainly more distracting than even “good sense”. I’m not advocating for total social media abstinence, but I suggest that you remove yourself from the praises of strangers and put yourself in a place with just yourself and your work. Without the constraints of trying to impress the masses and creating for the purpose of acceptance by those masses, I believe you can and will create more freely and truthfully. Use social media to share your amazing gifts as a creative rather than letting it dictate to you.

A good friend of mine recently told me that he once spent $25,000 on some of the best gear the industry has to offer just so he can make images for Instagram. He lost sight of his creative voice and got hung up on the “like culture”. Good news, though, he’s now on track and back to creating. Checkout Michaels latest work on Instagram @michaelcoutts_photography  and an interview he did with Frederick Van Johnson on ThisWeekInPhoto.com. Episode 540

In the end, never be complacent, never stop growing, question everything, and always strive to be a better you regardless of whether it gets you “likes” or not.


This post contains affiliate links. If you’d like to learn more, see my affiliate disclaimer here.

January 22, 2019

| by Spicyjello

Why I Love Aperture Priority

Posted in gear, Technique

I can hear it now—Aperture Priority? Pros only shoot on manual! Nope, that’s just another thread of misinformation that gets people confused and misled.

First and foremost, there are advantages to one method over another, but all that matters is, did you get the shot?

When it comes to camera settings keep in mind that there is no “right way”. I’m not just saying this to ease your mind and make you feel better about your current method. Instead, I say this to free some of you from the belief that if your hero photographer shares their personalized settings, you are not obligated to copy them. So often when I’m teaching and mention my camera setup, others immediately feel they should be doing the same. It’s just not true. Think of how other photographers use their gear as a reference for your own system. I believe it’s better for you to shoot on program mode until you find a need for greater creative control. No need to complicate your photography by applying settings you don’t fully understand. As your skills increase, so will your ability to use different configurations that will best serve you. At that moment, seek out the skills needed to execute your vision. Once you think you have it all figured out, I would respectfully suggest you always keep an open mind for new techniques.

Learning never exhausts the mind – Leonardo da Vinci

Aperture, Shutter, or Manual Settings

Here are some technical differences between the three. Each camera manufacturer labels their settings differently, so for the sake of this article I’ll be using Nikon’s labels.

Aperture Priority

My preferred method and idea for absolute control over depth of field.

The camera works to keep the exposure correct while maintaining the aperture you manually designate.

Advantage

While shooting a wedding where the lighting can change from one shot to the next with often very little time to evaluate each image’s proper exposure, I find aperture priority to be essential. I can grab my 85 1.4 Sigma Art series lens, set the aperture to 2.0 for a shallow look, set the ISO to 400 to keep my shutter speed in a workable range, and get to shooting. The shutter speed will vary as needed while maintaining a proper exposure at the aperture I designated, keeping the “look” that I love about that lens. Aperture Priority is ideal when lighting changes quickly so I that can pay attention to my subjects instead of exposure values.

Disadvantage

If you need to maintain a shutter speed to stop motion, Aperture Priority could easily change your shutter speed outside the workable range to properly stop motion.

Shutter Priority

Perfect for absolute control over motion.

I rarely use Shutter Priority unless it’s a concert or sporting event where I need specific control of motion to capture my subject. In Shutter Priority mode, the camera works to keep the exposure correct while maintaining the shutter speed you manually designated.

Advantage

For subject matter where the motion captured needs to be specific, Shutter Priority is ideal. For example, capturing a motorcycle as they come into your corner or you’re shooting handheld in low light. Shutter Priority will make sure that the shutter speed stays at the exact setting you choose to manage motion.

Disadvantage

Since the camera is working to maintain the shutter speed, the aperture becomes the variable. In this case, you may find the aperture increasing and decreasing the depth of field outside your ideal.

Manual

I only use this for macro and some landscape.

Manual is best for any situation where you need absolute creative control over motion, depth of field, and exposure.

Advantage

Complete control. Manual is excellent when shooting scenes where the lighting confuses the camera’s metering system. Manual is also great for maintaining consistency from frame to frame. Imagine, for example, that you’re doing a product shoot in a studio. You have set up the lighting and swapped out models for products. In this case, Manual will guarantee that each and every frame is the same exposure while Aperture or Shutter Priority will often vary from subject to subject.

Disadvantage

Human error. Manual can be slower and allows for user error. While Manual definitely gives you more control and through practice, you can become very proficient at making changes quickly, there is still a considerable margin of error. Manual shoots what you set while Aperture and Shutter Priority will adjust for correct exposure. Imagine being at a wedding and shooting a ceremony in the shade, and then you set your camera manually. Without any warning, the father of the bride comes around the corner with his daughter, and they are in the sun. If you are caught up in the moment, paying attention to what’s going on around you as you should, you might forget to change your camera settings—Aperture and Shutter Priority to the rescue.


So why do I shoot Aperture Priority?

I rely on my camera to do its job so that I can do mine. I want to focus—pun intended—on my subject. I’m very animated while shooting, trying to keep everyone on their toes and having a good time. I don’t want to be overburdened by making too many camera adjustments.

Just to give you an idea, my shooting method starts with me grabbing a lens and setting the aperture for the next round of exposures. Once the aperture is set, I pick an ISO that is close to what I think I need. With my gear, Nikon D5, D850 & Z7, I’m not too concerned about the lowest ISO since I’m confident with any setting below 8000. At this point, I start shooting. With my aperture decided and the ISO providing a range for the camera to pick a shutter speed to maintain a proper exposure, I can shoot and pay more attention to my subject and less to my gear.

Along with aperture priority, I also set my white balance on 5500 Kelvin. All day and in any lighting condition. Because lighting changes so dramatically on a wedding day, I find my post processing much easier to have a fixed color temperature for a series of images that I can quickly correct later rather than auto white balance, giving me invariably different settings or worse, me trying to make the changes and getting distracted from my subjects. Since we’re on the topic of camera settings, I should add that I don’t use back button focus either. I want my thumb free for moving my focus bracket, aperture preview, focus locking, and exposure locking—All functions that I can access at the same time while focusing and shooting.

Like I mentioned at the beginning, do what works for you, but just like the over popularized back button focus, there is no “best” or “right” way. It only matters what works for you. Test, test, test and test some more. It’s all about what works for you to captures those photons.


This post contains affiliate links. If you’d like to learn more, see my affiliate disclaimer here.

January 8, 2019

| by Spicyjello

Taking Photos is Only 10% of What I Do

Posted in Inspirtion

I love photography!

I really do. Photography was a hobby and an obsession before it became my profession. I chased and consumed all things photography, and at the time, I had no idea that it was going to be my only source of income for the next 25 years. On top of that, I had no idea at the time how much work was required to run a business.

I’m not trying to scare you away from making photography your career. I just want you to have an advantage as you venture into a highly competitive, over saturated, and often undervalued profession that is photography. If you think there’s no room for you and an over-saturated market means you can’t make a living, then you would be wrong. Regardless of what anyone has told you before and despite what you may feel, there is plenty of room for anyone that is good, dedicated, and professional.

There is always room in any market. The trick is to find your client.

By the way—The term “Professional” as I’m using it doesn’t have to mean full-time. Being a “Professional” is about how you carry yourself and the quality and integrity you display. You don’t have to adhere to Webster’s definition of a professional: “(of a person) engaged in a specified activity as one’s main paid occupation rather than as a pastime”. If you treat the industry, yourself, others, and your clients with respect and behave professionally, you are more than fulfilling the role.

The reality

There’s room for you! You can make it in photography and yes it’s worth it. Like any pursuit, it will be difficult, and there will inevitably be trying times. However, you can make it happen. Keep in mind though—You love photography right now. It’s maybe your hobby or a serious creative outlet. However, the moment you turn it into a business the story changes, and for a lot of people, the fun element will be gone. No longer are you getting up 3 hours before sunrise, driving 2 hours and freezing the entire time for the best light because you “want to,” it’ll be because now you “have to”. If you want to keep your car and buy groceries, you need to be out shooting. Shooting is only part of the business, though. You need to market, shoot, sell, print, deliver, and follow up over and over and over and over.

You don’t have to work for free

Pretty much every major industry within photography has been diluted and in many ways de-valued by an over-saturation of people not taking care to appropriately price and behave. So many new photographers think that charging less and getting a shoot is building a business. On the contrary—That practice is only destroying their own and others financial future by setting meager expectations of price.

Concert photography is an excellent example. So many are willing to shoot for free to get experience that they fail to understand and recognize the job and profession that is Concert Photography. In doing so, this mentality is only setting themselves up for future disappointment. If you shoot for free and allow an industry to use you for free, someday you will want to be paid and they will just find someone else that will work for free as you did. Don’t get upset when this happens, that’s how they were trained. But I digress……

One interview after another, and another…

As a full-time wedding photographer, every initial meeting with a potential client is like another job interview.

Every time you want to solicit a company or a person to hire you for a shoot, you’re applying for a job. For my business, Imagery Concepts, we go through the process about 30 times a year for the last 25 years—That’s 750 successful job interviews. It’s a little stressful to say the least, but that’s precisely what’s required.

How to make the 10% count

As I was making notes for this article I was actually surprised by how quickly I came up with jobs we do for our business that don’t include any photography. Here is a list of nearly 60 activities we are responsible for that don’t require me to photograph someone:

Learning your gear – Shutter speeds – Aperture – Depth of Field – Lens Choice – Understanding light – Data Management – Color Management – Software for editing – Lab orders – Sales – Marketing – Pricing – Taxes – Insurance – Business License – Branding – Website – Bank Accounts – Business Cards – Letterhead – Advertising – Merchandising – Vendor Accounts – Payments – Social Media – Twitter – Instagram – Facebook – Pinterest – Linkedin – Email – Voicemails – Attire – Appointments – Client Meetings – Scheduling – Accounting – Phone Calls – Texts – Messages – Mistakes – Vehicles -Maintenance – Office space – Leases – Contracts – Deadlines – Vehicles – Data Plans – Subscriptions – Licenses – Permits – Memberships – Employees – Investments – Education

I tend to believe in focusing on what I’m best at. At Imagery Concepts, my wife and I work together. I’m the creative and primary shooter. She handles sales and communications (which includes social media). We work together and make decisions together. As a team, we do all jobs as one person, but it’s the specific tasks that we divide. This is key for us because I don’t want to do sales, but she loves it. I love learning new gear, software, and techniques while she would prefer to talk with our brides, vendors, and help plan the wedding day. It’s a perfect combination for us. With this system, the 10% shooting works for me.

I know you can do the same. You may not have a spouse that’s willing to do your sales, but you can find someone to help or you can build your business so that your sales process requires less of your attention, ultimately allowing you to focus on what you prefer.

How to reframe your business to your benefit:

  1. Step back and look at your business or the business you want to build.
  2. Make a list of the jobs you want to do and a list of those you don’t.
  3. Try to get someone to help you with the less desirable tasks and focus on the ones you like best.

That last step is crucial. It will not only help you keep your sanity, but I believe when you are not burdened with the responsibilities you dislike, you are more open to new ideas. You will have the freedom and the space to allow the best of yourself to grow and flourish. This is the ideal situation for you to innovate your business and become more marketable. If I spent all of my time doing the tasks my wife doest that I don’t prefer, I wouldn’t have time to learn and grow my photographic skills. When I have time to grow, I become a better photographer and that alone will keep me in business.

Embrace the 10%

If you can make that percentage even larger, a big high-five! Share responsibilities where you can and focus on that which you are best at while remembering that, when you’re finally shooting and all the other work has been done, you can enjoy your craft.

So why do it?

Why go through all of the challenges to do the part that I love so infrequently? It’s because I love photography. It’s because although I may only shoot a small fraction of the time compared to the work it takes to run a business, the business keeps me in photography. I may not be shooting all the time, but with everything I do, photography is at its core. I eat, breathe, and sleep photography. Photography guides my vacations and has influenced who my friends are. It’s my every day all day and for me, so worthwhile.

Do what you love, and it won’t seem like work.

January 1, 2019

| by Spicyjello

Hello Capture One, Goodbye Lightroom

Posted in Software

Featured image edited using Capture One

With so many RAW editors on the market today it’s hard to decide which is the best. Well let me just say, there is no “best”. What works best for you is what matters. Choosing software can be daunting especially with all of the promo and promises out there. At the end of the day, software is a tool just like a camera body. So long as you can get your images tuned how you like and your clients are happy, it’s the perfect fit.

In this post I’ll be mentioning three of my primary image tuning tools while focusing on my migration from Lightroom Classic to Capture One.

It’s been two years now into my migration from Lightroom to Capture One and Luminar. In short, it’s been a colossal pain! First and foremost, learning a new RAW workflow is like learning a new language, but for me, its been worth it and I’m glad I made the move.

Luminar

Let’s look at Luminar 3 before I get to Capture One and Lightroom. For me, I use Skylum’s Luminar platform as a plugin to Capture One, Photoshop, as well as Lightroom. My primary use of Luminar is for inspiration. Its AI features, such as the AI Sky Enhancer and Accent AI Filter, will often times highlight the best features of an image that I might not otherwise have arrived at by my own tweaking. There’s also a great selection of presets for even more creativity.

Another huge plus for Luminar is the price. At $69 retail it’s hard to beat and a great companion app to any raw editor. Skylum, who is also the developer of Aurora HDR, is big into AI and are continually updating their software—Definitely a company you should keep an eye on.

Click here for a more in-depth read into Luminar.

Right: Example of Luminar AI Sky Enchancer + Accent AI Filter

Capture One

I started with Lightroom 2 10+ years ago and stuck it out until I felt there was a system that worked better for me. I still mostly love Lightroom and know that it’s an entirely viable piece of software, but I wanted better. Thus began my journey into Capture One.

Capture One has been around as a RAW editor just as long as Lightroom if not longer. It was the improvement in image quality that got me so excited about the switch. The best way I can describe it is “fidelity”—Capture One allows my images to speak with a more dynamic range of color and tonal range. It’s almost like listening to music in my truck (Lightroom), which has a great system, versus listening to the same artist live (Capture One). There is a tangible, but not always, definable difference.

It’s also fair to point out that, in my experience, all RAW editors have a personality of their own—A “look” if you will. We don’t need to get into the reasons why, however, we do need to be aware that the look of Lightroom is not the same as Capture One, Luminar, On1 Photo Raw, Alien Skin……the list goes on. At this point for me, I love the “Capture One look” along with its robust set of tools.

Click here for a more in-depth read into Capture One.

Lightroom and Capture One side by side

Left: Lightroom / Right: Capture One

The comparison

Although I have a lot of experience with Lightroom, nowadays I rarely use it. I have completely moved over to Capture One and after some growing pains, I couldn’t be happier. The only time I get back into Lightroom is when I have an older job to process that was initially edited in Lightroom. Otherwise, it’s all Capture One.

1. Stability

While both programs are reasonably fast on a modern machine, I feel Capture One is more stable and less likely to be broken in an update. I always cringe when I see Adobe has a new update for Lightroom or Photoshop, so often those updates make changes that either break my workflow or add additional hurtles. For exampe, I have an extensive preset collection that I use on a regular basis. In a recent update when the presets were converted to the new standard, several key presets stopped working. I also use the Palette controllers as well as a Shuttle Pro controller. It’s always a crap shoot if those will keep working after an update.

2. Local adjustments

While Lightroom has better noise reduction and an overall “smoother” look where Capture One is distinctly crisp. You can definitely get either one to look mostly like the other, but they still have their own unique personalities. Lightroom will allow you to adjust specific colors in the HSL panel, but Capture One will allow you even more control with the selection of a specific color range and the ability to create an adjustment mask from that color selection. It’s impressive and something you need to test.

Capture One also has a skin tone adjustment in the color tool that is very helpful for balancing and tuning portraits—A big plus over Lightroom. While both programs have local adjustment capabilities, Lightroom has a limited palette for local adjustments while Capture One offers nearly all of their adjustment options as layers, making it one of the most prominent and powerful features of Capture One.

For example, while Lightroom offers local adjustments with some level of luminosity control, Capture One features legit layers with luminosity masking! It’s brilliant, and if this were the only feature difference I would still switch, it’s that good. Did I mention you could also create layer masks from color range selections? So nice.

Another great feature of Capture One is Focus masking—For you mirrorless shooters, think of focus peaking. If you’re not familiar with focus peaking, when enabled, any area of an image will show a colored mask where the image is in focus. This feature is brilliant for faster culling. It’s my understanding that Capture One uses the info in the raw file to determine focused areas and only works on supported RAW files. I couldn’t function without this feature now that I have it.

3. Catalog and session handling

In short, a catalog is similar to what we are familiar with in Lightroom as a database that holds all image information (including metadata, adjustments, etc.) for multiple jobs containing files in many locations. Capture One will allow you to have multiple catalogs open at the same time, which is a massive plus when managing data that might be on a remote drive. Meanwhile, sessons are commonly used for one project at a time. Sessions can also be very self-contained, so they are much easier to move, backup, and share if needed.

The debate about which setup to choose or which is best will not be quickly answered. I personally use catalogs because I want to have access to all of my images at once for searching.

For a more indepth explination checkout this pre-recorded webinar hosted by Capture One.

Tips for making the switch

Here’s a brief list of things to be aware of if you’re looking to make the switch:

  1. You will lose all of your image adjustments. Lightroom and Capture One don’t share editing info, so you’ll need to re-edit your images in Capture One. Although it sounds terrible, it’s not really. You may just come away with a better image. For any finished images you have in Lightroom, I would suggest rendering out as PDS’s or TIFF’s and import alongside the RAW file into Capture One.
  2. You may lose your keywords and ratings. Lightroom stores all of your settings, including keywords and ratings, in a database. You need to configure Lightroom to write changes to a sidecar file so that the info can be read by Capture One on import. To reiterate, your image adjustments will not transfer.
  3. “Presets” will be referred to as “Styles”. Capture One uses the term “presets” to refer to parameters for a specific tool, while “styles” are adjustments saved from multiple tools are more like what you might be familiar with in Lightroom as “presets”.
  4. Heavy reliance on levels and curves. Lightroom adjustments doesn’t require you to touch levels or curves much, where Capture One relies heavily on them.
  5. Overexposure settings are different. Lightroom has “whites” and “highlights” slides to correct any overexposure whereas Capture One has only “highlights” and “shadow”. You may initially think they work the same, but they don’t. In Capture One the “highlights” and “shadow sliders are intelligent and offer a more fluid adjustment from image to image with often better results.
  6. There are no modules like developing or library in Capture One. With Capture One you can pretty much do all things from all places.
  7. All of the shortcuts are different. Don’t worry though, you can custom configure just about any action(s) in Capture One with a shortcut of your choosing.
  8. Don’t edit the same folder of images between Lightroom and Capture One. This could cause edits to be lost and potentially increase glacial melt. It’s best practice to separate images if they need to be touched by both applications or only move the through editors in 1 direction.

Final thoughts

Should you switch to Capture One? I can’t really answer that for you. I’m glad I did and have no regrets. I will say, though, that migrating from Lightroom did take a significant amount of time to learn the application, organize, and build a productive workflow. All in all, I would suggest diving in deep and really commit to learning it before you decide.

I wish you fun exploring!


For some amazing tutorials be sure to checkout the Capture One YouTube channel.

This post contains affiliate links. If you’d like to learn more, see my affiliate disclaimer.

If you would like to support the efforst of this site, simply shop at Amazon using this link.

Capture OneLightroomLuminar

December 17, 2018

| by Spicyjello

Walk Slow and Read

Posted in Inspirtion

Some time ago along with a few friends, my wife and I decided to spend a couple weeks in the backcountry in and around Yosemite. Although we had never done backcountry camping before, we were open to the adventure.

Our destination was a lake some 12 miles back outside of Hetch Hetchy. As we started our hike, we were much more interested in the destination than the journey. I remember loving the smell of the forest and the cool quiet that surrounded us. Today I love the outdoors and attribute some of that admiration to this trip.

As we rushed along the trails I took a few images but never really stopped to enjoy the view like I would today. Back then I was carrying a Minolta X-370 film camera. I wasn’t yet a photographer but this was the camera that started it all for me. I shot some slide film during the trip but mostly black and white which I processed and printed myself.

Our trip was full of many surprises, one being a jet-powered helicopter flying over our campsite every morning at sunrise for five days, constantly grabbing water with a bambi bucket from a river to extinguish a nearby fire. That thing was loud—I mean the kind of loud that scares you even when you know it’s coming. Needless to say, we cut our stay in that area short. Being woken up by a jet-powered helicopter wasn’t our idea of a good time.

Did I mention the mosquitos yet? They drank the Deet repellent of off our bodies like a morning tea. In case you ever wondered, Deet will melt pretty much everything plastic. My Raybans still show some scars from that trip. At one point of the trip, my wife counted… counted I say… over 150 mosquito bites. That was a long night in our tiny tent applying calamine lotion.

Despite the challenges we faced, it was a great five days in the backcountry and the surrounding wilderness getting to talk to some cool hikers on the trails and experiencing some fantastic views.

A defining moment

We came into a clearing where the path made a slight left. I can still see that clearing and remembering all I wanted to do was get to camp so I could take my boots off. There was an older guy just sitting to our right probably enjoying the view of the area we were about to blaze through. He reminded me of someone that had been in the outdoors for some time and someone that was completely content.

We paused for some water, said a quick hello and just as we turned to head out he said, “Walk Slow and Read”.

I clearly remember thinking at that moment “what a silly thing to say”, and off we went. For some reason, that experience never left my brain. I’ve thought about it for years and here I sit some 25 years later writing about it. It had an impact on me that outlasted most of my high school education. Some years ago I even made a sign of the saying which I still see multiple times a day. That sign reminds me to slow down and enjoy each moment when possible, but it also makes me think about what I may have missed because I was always running at full throttle.

I recently returned home from a short trip to Zion National Park. I have been many times, so I knew where I wanted to go and what I wanted to photograph. I also didn’t have much of an agenda, so we just took our time and wandered more than anything else. It was great! I felt like I really got to enjoy the park more than earlier trips where we rushed from one potential capture-spot to another. Maybe that guy was right!

Walk Slow and Read

I used to embrace “Walk Slow and Read” as a concept that I agreed with but didn’t entirely adopt. I thought of it as more of an idea that I would envoke at a particular moment rather than a life philosophy.

I have no clever formulas or charts to prove that we all work too much or that we all need a long vacation. However, since most of us work more than we vacation, I feel confident to say that we all work too much and we all need a vacation.

Time passes so quickly, but I have an idea for how we can slow it down just a little. If we “Walk Slow and Read,” remember, and embrace our moments, we will set a marker in our memory of that experience. The more markers we set, the fuller and longer the year can feel and maybe slow the passage of time.

With the recent passing of my father, that brief encounter with an unknown man that instilled those four words into my being, “Walk Slow and Read,” has taken on an even stronger meaning.

Be the tortoise. It’s the journey that matters not the destination. Stop and smell the roses. These are all very similar sayings that never stuck with me even though I understood the concept. Life is too precious to blaze through a beautiful clearing and to not walk a little slower to read the world around you. “Read” the clouds, “Read” the trees, and take it all in. Take the time to connect with people. Years ago, I attended a workshop by a photographer named David Peters. He challenged us while on our lunch break to learn someone’s dream. Crazy talk I thought! No one will tell me their dream. I was amazed to find that simply complimenting our server and asking what they did when they are not “here” was all it took. They shared how they wanted to go back to school and become a nurse. How cool! Marker set.

There are certainly times to run and walk fast so long as we can remember to “Walk Slow” more often before we run, and remember to soak in and “Read” the precious moments we have “for tomorrow is promised to no man”.

Another take away for me is to be open to an experience you might not expect. If we are always in a hurry, there are a lot of opportunities we could miss. It could be as simple as someone looking at you from across the room, or as significant as recognizing a need in an industry that you could fill and build an empire from.

Taking a hike led me to a saying and experience that changed me. I believe that so long as we are open to the input, the universe will be willing to share.

So my friends,

“Walk Slow and Read”

December 9, 2018

| by Spicyjello

Why Infared is Awesome

Posted in creativity, gear
Zion Infrared pano shot with the Nikon Z6

Infrared: The other light.

Have you ever wanted to take a peek into a hidden world, another visual universe, or see the unseen? Well… you can with infrared photography.

With infrared photography, you see a spectrum of light just outside what our eyes can detect. It’s not the infrared you see in the movies though; you can’t see in the dark with a camera and not everything will be that cool, Matrix green. Although, with an infrared light source, you actually could see and photograph in total darkness if you wanted.

Infrared photography will allow you to see everything around you in a different light (pun intended)

My first encounter with infrared was with a friend of mine while we walked through the desert. I was shooting color and he was shooting infrared. I looked at the back of his camera and was blown away— It was black and white but new, amazing, and not something I could simply match by converting my images to black and white.

As a result, I quickly converted my Nikon D7000 and took a 3-week road trip to Washington. I expected to “test” the infrared on the trip and shoot with my other gear to capture most of the trip in color.  Well, that’s not what happened. Once I started to see the world in infrared, I never looked back. I shot 90% of my trip in infrared (aka 1000s of images). All of those fantastic mountains and lush rainforests—All infrared. Coastal lighthouses, small towns, and bridges—Definitely all infrared. It was amazing for me. I saw something entirely new, and it was exciting to say the least.

Infrared is impressive to me for a couple of different reasons

1. It’s unpredictable

First, I love black and white photography and I think everything looks best monochromatic. I spent countless hours early in my career agitating 35mm film in developer and then many more hours in the darkroom rocking a developer tray—So the monochromatic force is strong in me. Sure, I can convert and tweak a color image to black and white, but it’s normal, and everyone can do the same.

Infrared is different, challenging and unpredictable, Perfect!

For those of you that want more than a monochromatic experience, there is faux-color infrared. Depending on the conversion method and the amount of visual light allowed to hit the sensor, there can be an interesting duo color element to play with.

2. It’s unexpected

Another reason for my love of infrared is that it surprises me. I have been a professional photographer for just over 25 years at the time of writing this, so I’d say I’m good at seeing and using light. Infrared is just different enough that I can’t always predict how someone or something will look.

Although properly handled, infrared can produce some soft and unique skin tones. The real advantage of infrared is landscapes. Infrared changes everything. Skys go dark, trees, water reflections, pretty much everything changes. It’s like an additional layer just under the surface of what we are used to seeing, and for that reason, I LOVE Infrared.

Pro tip: People usually don’t look great, as their eyes go dark and their skin appears pale. It’s great for the Halloween season but not so great for brides and portraits.

How to get started

So, you ask, “what’s so different and how can it be better?” I hear ya. Who wants to take an expensive camera and make modifications? Besides me, that is LOL.

Here’s some examples of what you have to look forward to after taking the step of infared conversion:

But now that you’re convinced, what’s next? It all starts by converting a camera, which can cost between $300-$400. Don’t worry—Your converted camera can always be returned to mundane color, and the cost for converting back is usually much less than the original conversion. I won’t go into the technical details here; you can contact my favorite conversion experts at Spencer’s Camera. They will guide you and answer all of your technical questions. They also have a very informative website full of images and additional articles—Well worth having a look.

Choosing the details

When looking for a body to convert, I’d say a mirrorless camera is best, and my most recent and favorite conversion preference is the 590nm. This conversion allows in additional visual light which will enable me to tweak and play a little more with the colors and conversion to black and white.

A bonus of a mirrorless camera is the active viewfinder, whic makes shooting much easier. Otherwise, use a camera that can shoot and focus via live view to eliminate the need to calibrate a lens.

Keep in mind: Infrared light does not focus properly when being bounced in a DSLR if you don’t have a properly calibrated lens. Everything will be slightly out of focus as a result.

Post processing

Once you have a converted camera and filled a memory card with infrared amazingness, processing your images will be the next big step. If you shoot RAW (and you do only shoot RAW right?) then your images will be very magenta/red, like this:

A simple conversion to black and white will get you started on your journey to infrared bliss. Keep in mind, though, that there are colors in that image. On elements such as skies or grass, try using the white balance eyedropper in Lightroom, Capture One, Luminar, or whatever raw editor you prefer, before converting to black and white. The white balance can have a pretty dramatic effect.

Now you’re ready to play

Now that you’ve got your infared converted camera and post-processing methods figured out, it’s time to walk outside and point your camera at everything. Pine trees and succulents will glow even in the shade. Oak trees, not so much. Blue skies with clouds are amazing, and water is always a surprise. If you like to photograph people, give it a go and don’t stop playing.

If you would like to see me do some infrared editing, checkout this “Watch Me Work” episode on ThisWeekInPhoto.com

Now that you’re excited and ready to make the leap or perhaps do more research, I have some assistance for you. Check out the fantastic humans at Spencer’s Camera where I do all my conversions and those of all my friends. I’m a longtime customer and am not endorsed by them in any way. I truly recommend them.

When I picked up my recently converted Nikon Z6, I mentioned to them that I wanted to write an infrared post and they gracously offered a coupon code that I could include for all you amazing people.

Use the code spicyjello25 for $25 off anything over $200.

May you have a wonderful time exploring your infrared world!


This post contains affiliate links. If you’d like to learn more, see my affiliate disclaimer.

If you would like to support the efforst of this site, simply shop at Amazon using this link.

infraredZion

December 2, 2018

| by Spicyjello

My Nikon Z7 Makes Me Happy!

Posted in gear

After living with the Nikon Z7 for a few months now and having put it through its paces on a few wedding and engagement shoots, I figured it was a good time for a proper review. If you would rather skip the chatter, read the breakdown.

Just a heads up, this post will not be a head to head or a tech-heavy review. I’ll be sharing my personal experience as a full-time professional wedding photographer with over 15 years shooting digital with a Nikon D5 and D850. I don’t do video, so I apologize if you are hoping from insight from that aspect.

So, how good is the Nikon Z7 really?

Right off the bat—Nikon’s Z7 does make me happy!  It’s a solid piece of equipment that’s professional and ready to go to work right out of the box.

I have always believed that “gear does not make the photographer, but the photographer can make use of the gear”. Gear for me is just a tool that gets a job done. I don’t believe that any specific brand is better than another or mirrorless is the best revolution in photography. I love that fact that there is healthy competition and we, the users, are the winners. Nikon and Canon having made a move into mirrorless isn’t a game changer for me—It’s an evolution of a tool. Bottom line, picking the right tool for the job is more important than having the latest tool.

Familiarity

What’s impressive about Nikon’s new Z series is that for me, it feels immediately familiar to my Nikon-trained hands. The same can be said for those Canon shooters who look at Canons new EOS R mirrorless. As I sit here writing, the Z7 is right in from of me. Picking up the camera without even looking, I know where to “feel” for my controls like the exposure compensation button or the D-Pad on the back to move my focus points around. All of the symbols are in Nikon, and all make sense to me. Seems like a little thing, but already knowing the camera and menu system means the camera will get out of my way and allow me to just shoot.

Mirrorless

Now, if you don’t already know the wonders of a mirrorless camera, let me share. First of all, mirrorless, in general, is just like any other camera. My good friend, Frederick Van Johnson of This Week In Photo likes to say, “Cameras just capture photons”. So basically, all photon capturing boxes are the same and the difference is the features built around the photon trap. Simply put, mirrorless is no better than a DSLR at capturing photons. The most prominent feature of mirrorless for me is the live viewfinder. It’s amazing!!! It would only be fair to mention that Panasonic, Olympus, and Fuji, as well as a few others, have been doing the mirrorless photon capturing for a while now. So it’s not entirely new, it’s just gaining more momentum. I feel that important to mention because I see out in the world that there is a fever for mirrorless. It’s pretty cool for sure, but it’s not a genie bottle and doesn’t grant wishes. It’s a tool.

So why even consider mirrorless you might ask? Size and weight can be an advantage, however, if you add a booster and fast glass, you won’t really save much on weight—It’s a give and take. Image stabilization is another considerable advantage in mirrorless bodies. Having in-body stabilization with up to 5 stops reduction is huge, and with the Z series adapter, that means even your non-stabilized lenses can benefit. Lastly, my favorite mirrorless feature by far is the live viewfinder.

Fire

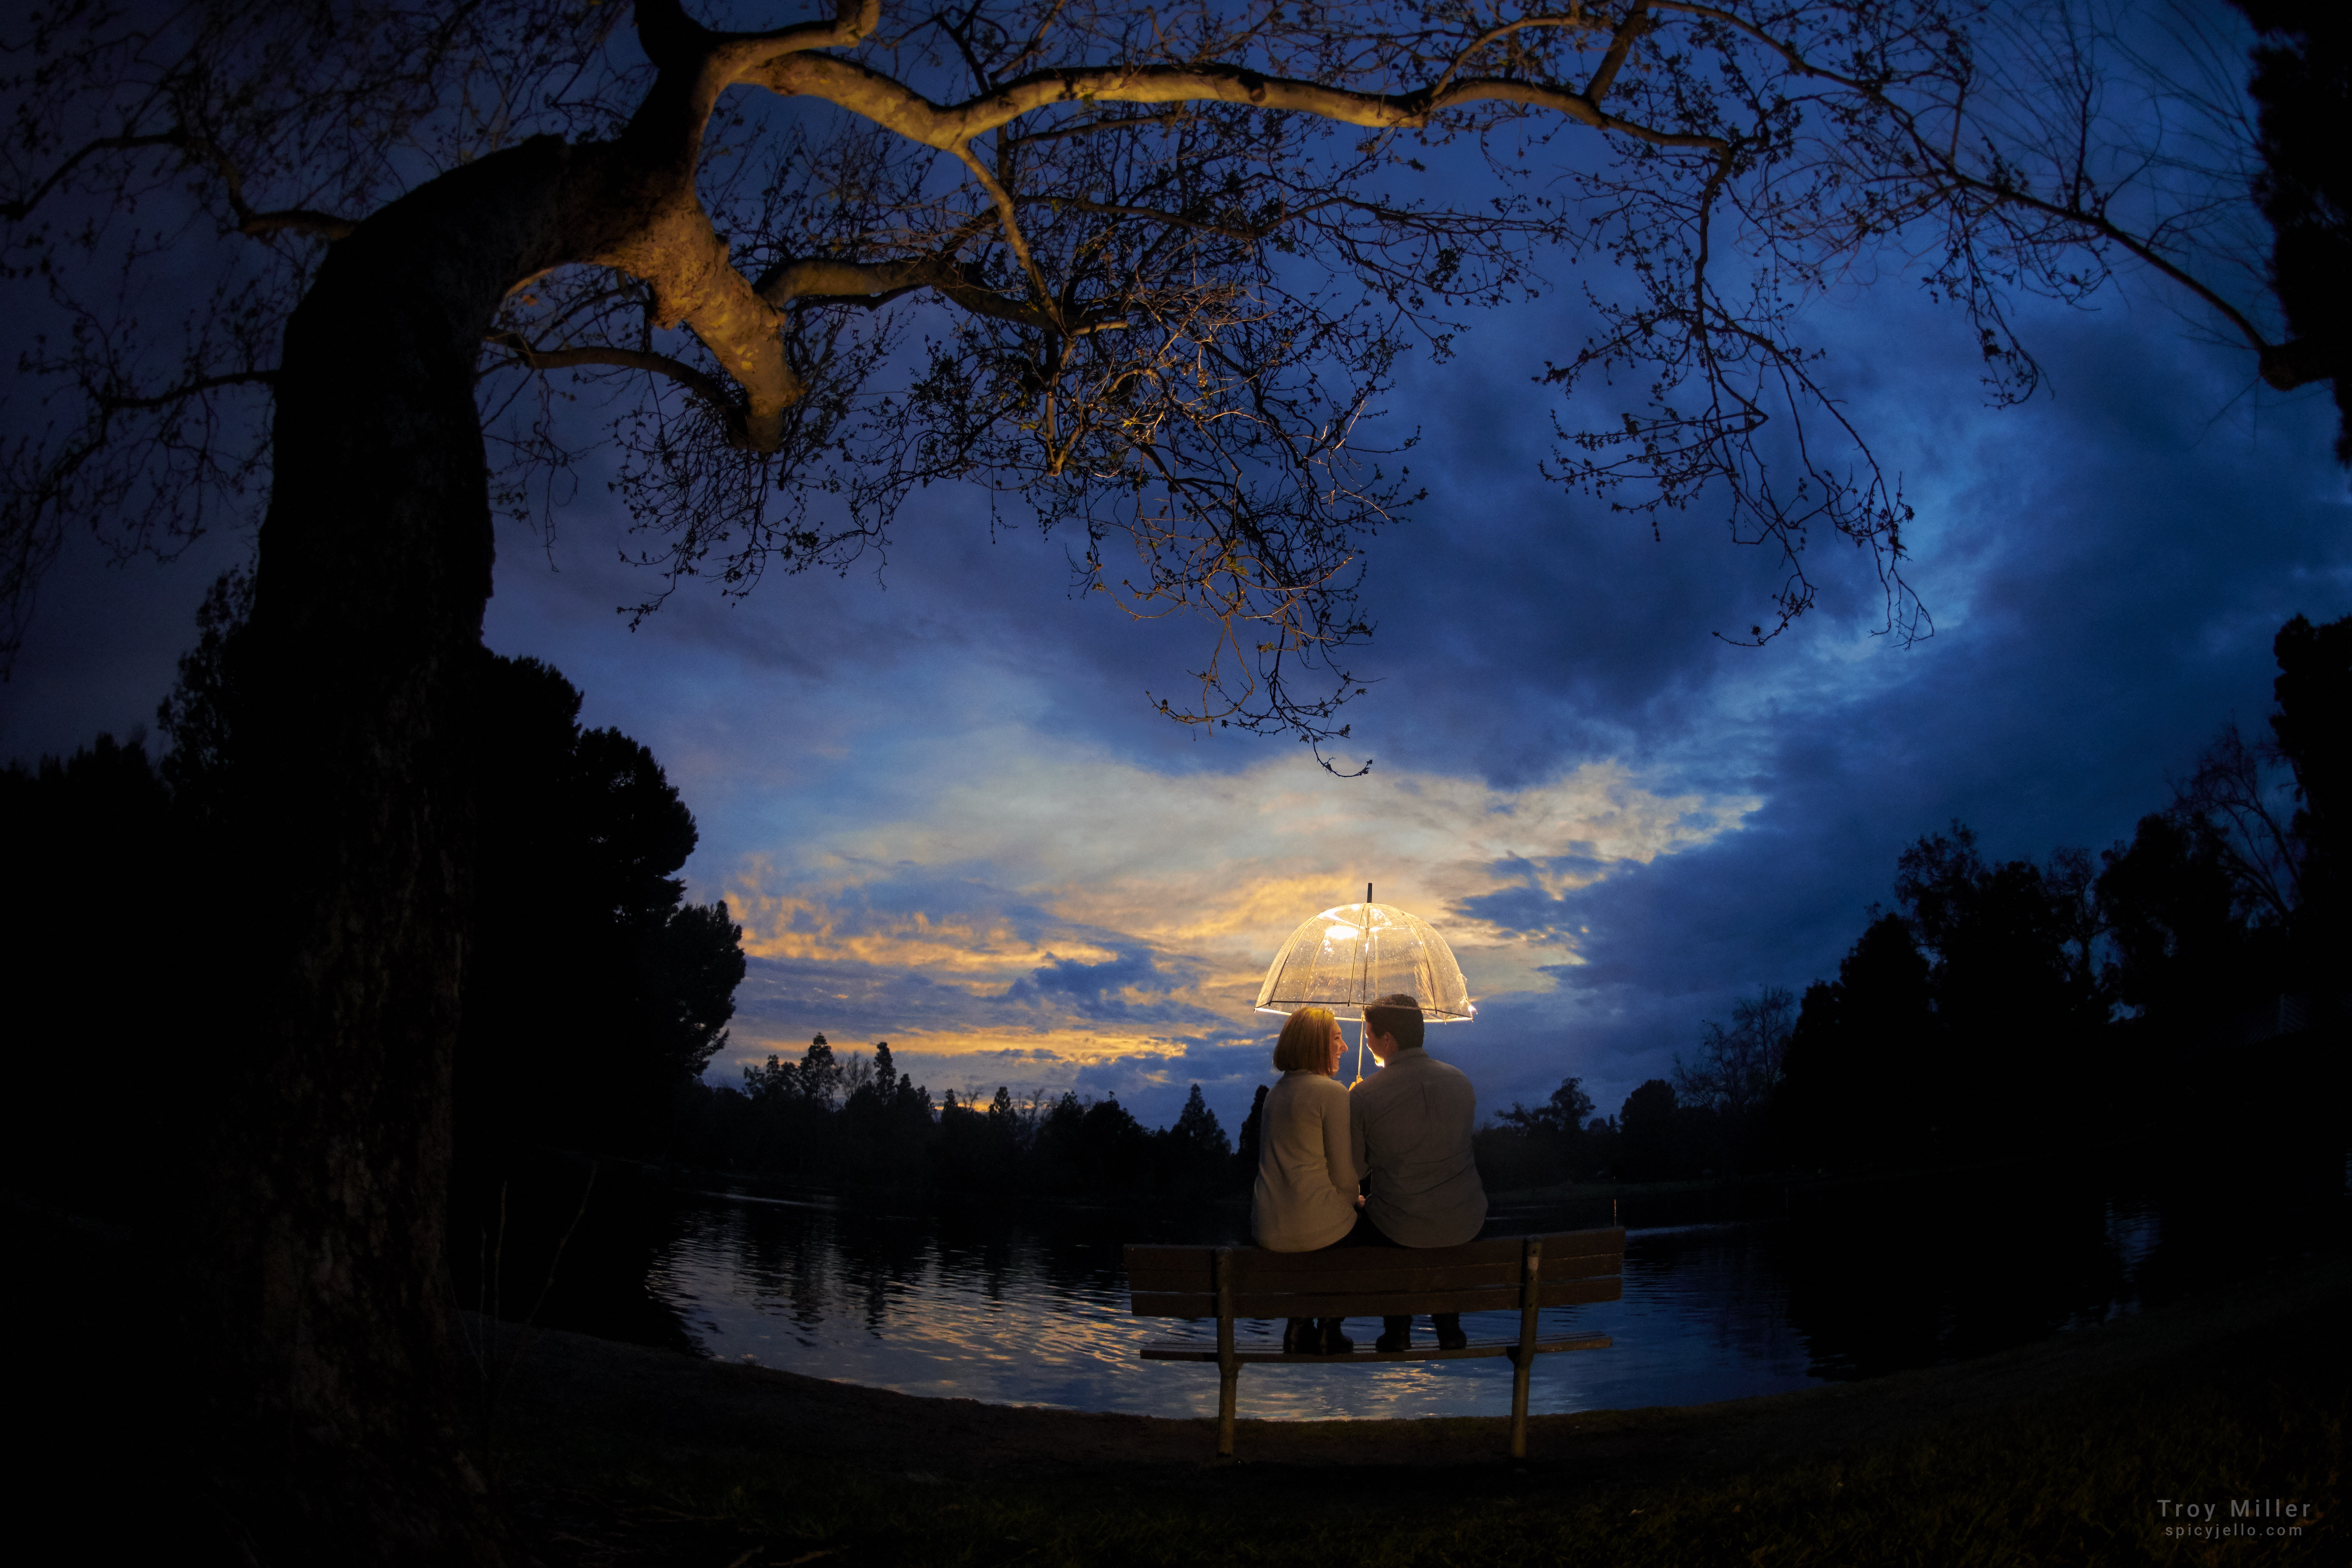
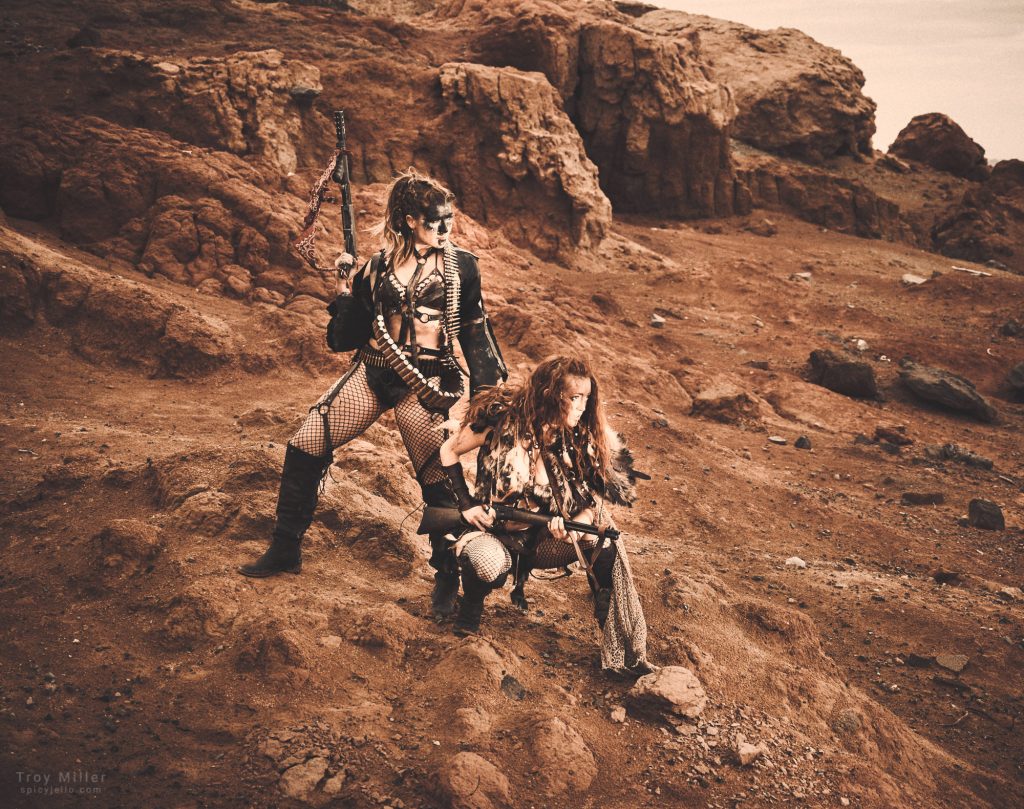
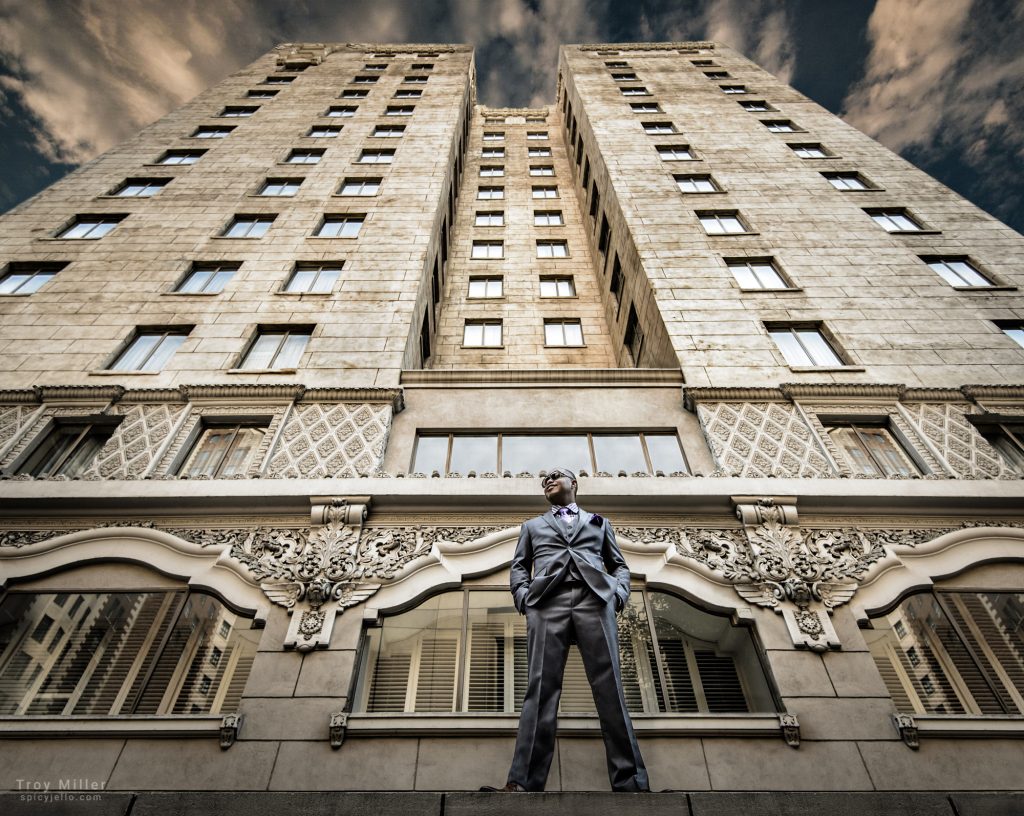
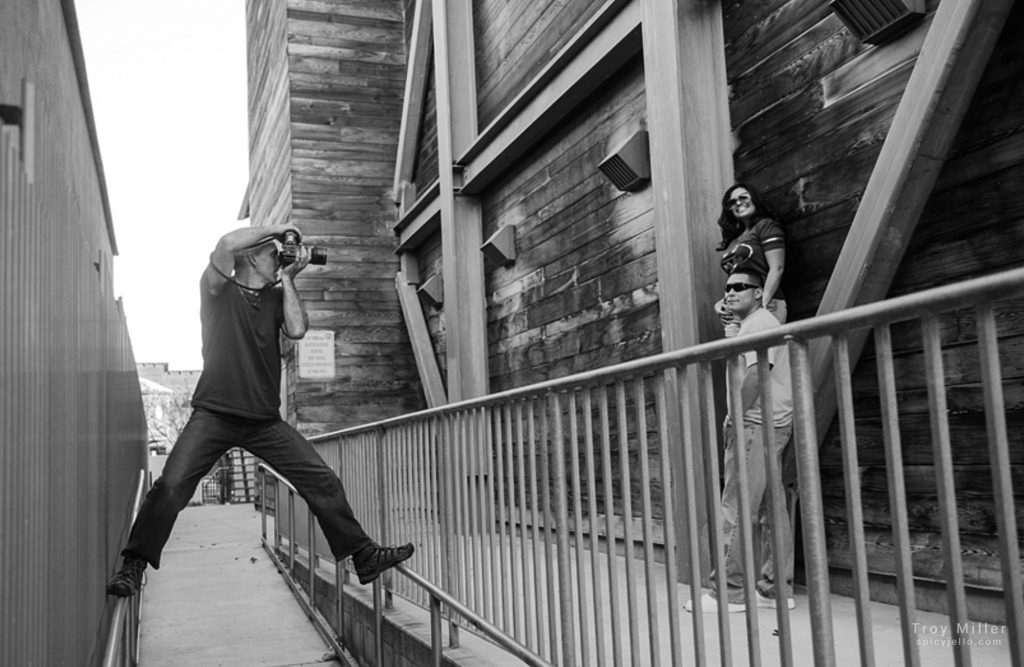
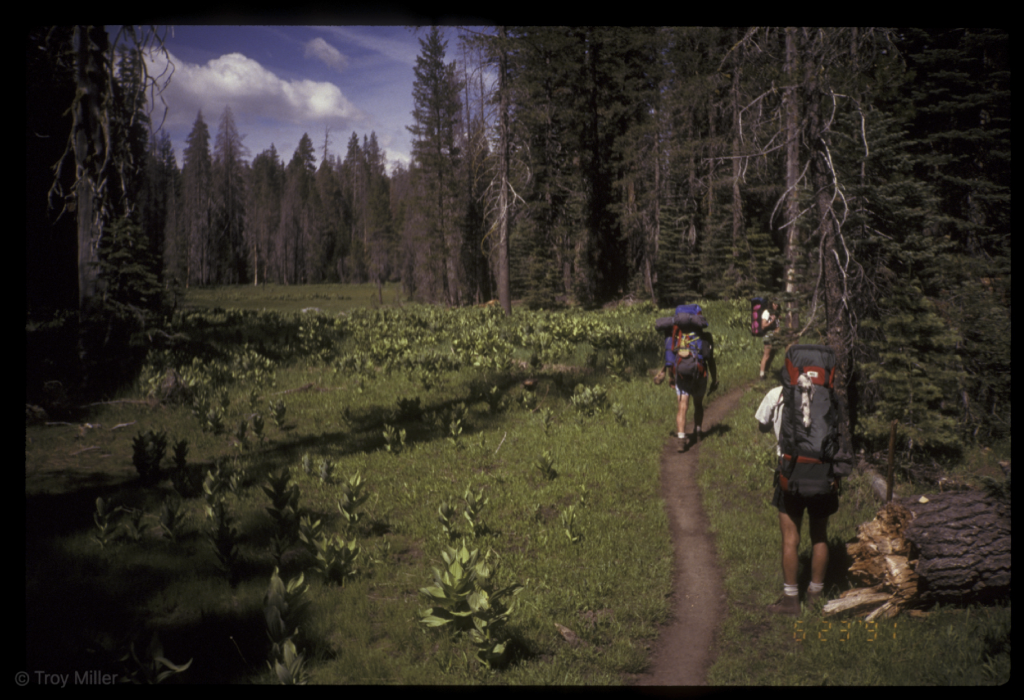
Nikon Z7: 1/3200, f4, 6400iso, Nikon 70-200mm f4 lens

Simple Integration

Kudos to Nikon for building the Z Series as a modern revolutionary piece of camera equipment that integrates into the existing Nikon ecosystem. It’s not only that the lenses and gear all work together, it “feels” Nikon. I can’t tell you how much that matters to me and I never really knew it would. The idea that I can grab the D5, D850 or the Z7 and shoot without fumbling is fantastic. I don’t mean the “walk in the backyard and find a pretty flower patiently waiting for me to stroll by kind of shooting”—I mean “grab a camera and start shooting the first dance and shots of dad kissing the bride on the cheek” kind of familiar. I’m pretty confident that if you shoot Nikon, the Z will “just work” for you

FTZ Mount Adapter

This adapter! I did get the new 24-70 lens and use it constantly, but I needed Nikon’s FTZ adapter. Thankfully, it’s reliable and easy to work with, however I do wish the price were more manageable as I would love to have a few floating around. I currently pre-attach it to my Nikon 70-200 f4, so it’s easy to jump between that and the native 24-70

The breakdown

Pros

Very Nikon
Buttons and menu will be familiar to all Nikon owners

“Camera on”
The Z is on and ready in record time. Coming from shooting a Sony that takes forever, it’s a nice feature.

Image stabilization is outstanding
I could not believe how well the IS worked with the native 24-70. I shot images at 1/6 sec no problem. Amazing. Image stabilization was not as stellar with Nikon’s 105mm macro, though, and I’m not sure why. I need to play more. The 105mm macro lens is internally stabilized and worked well, just not like the native lens.
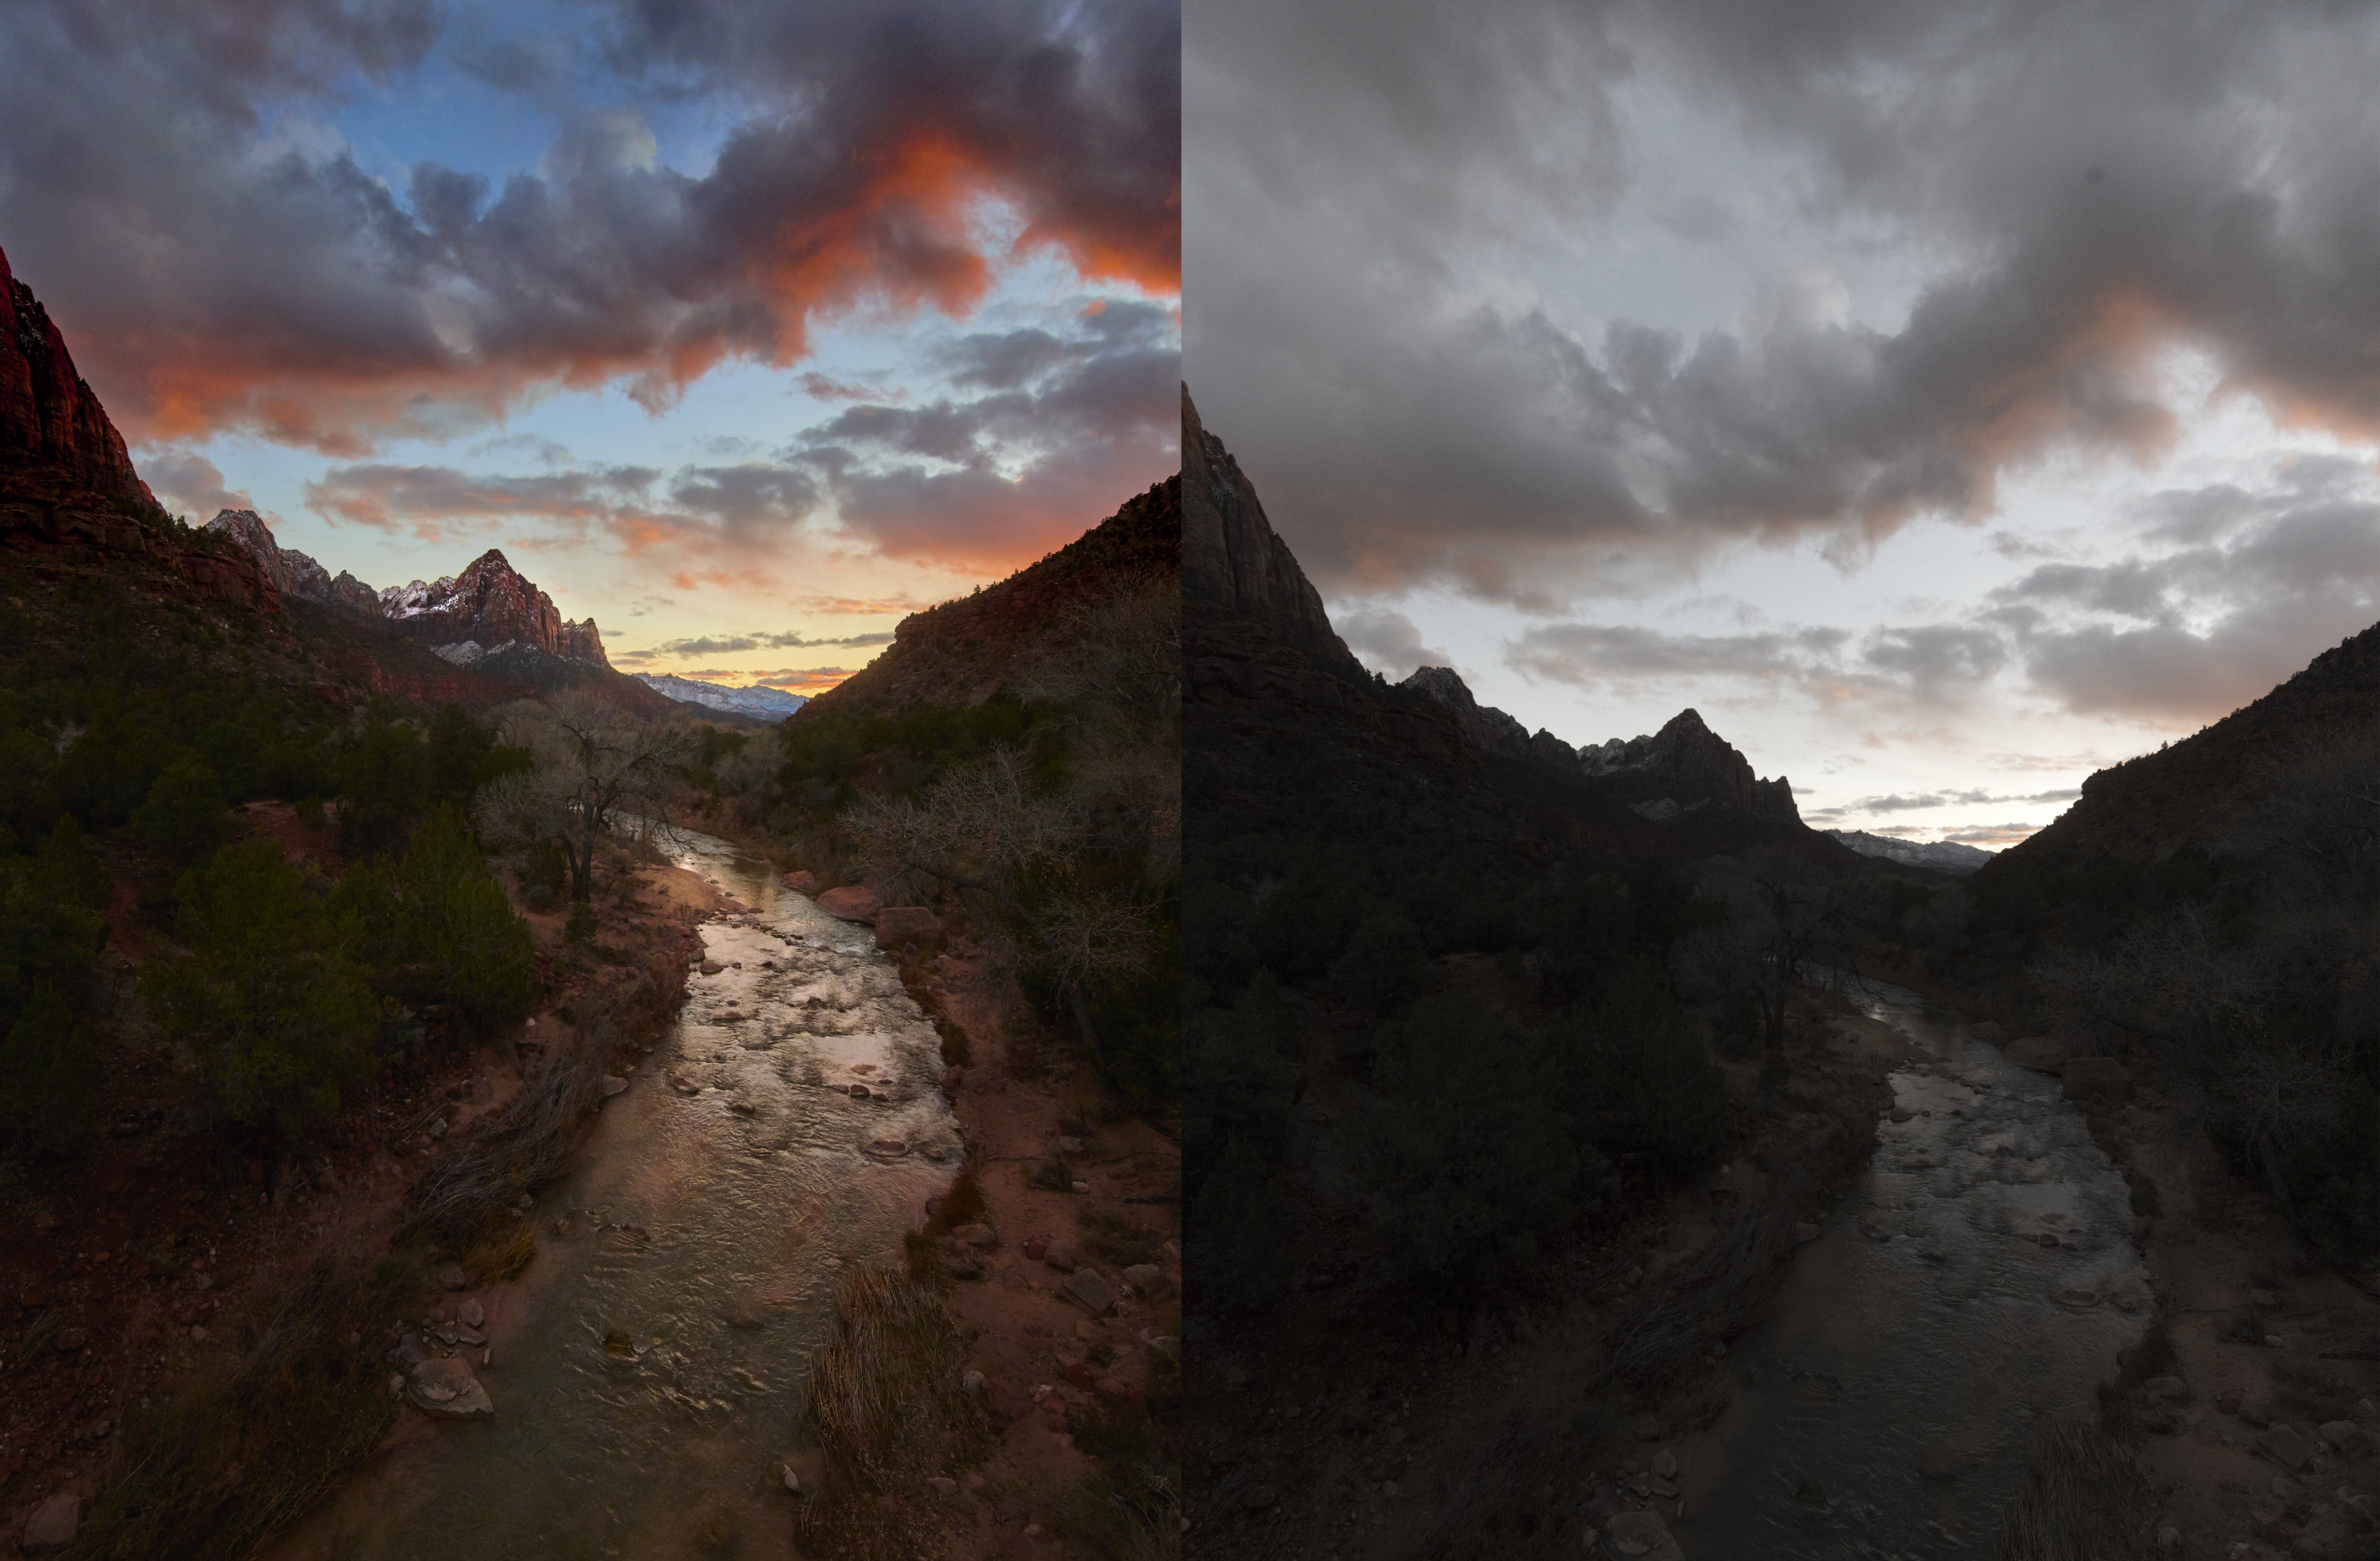
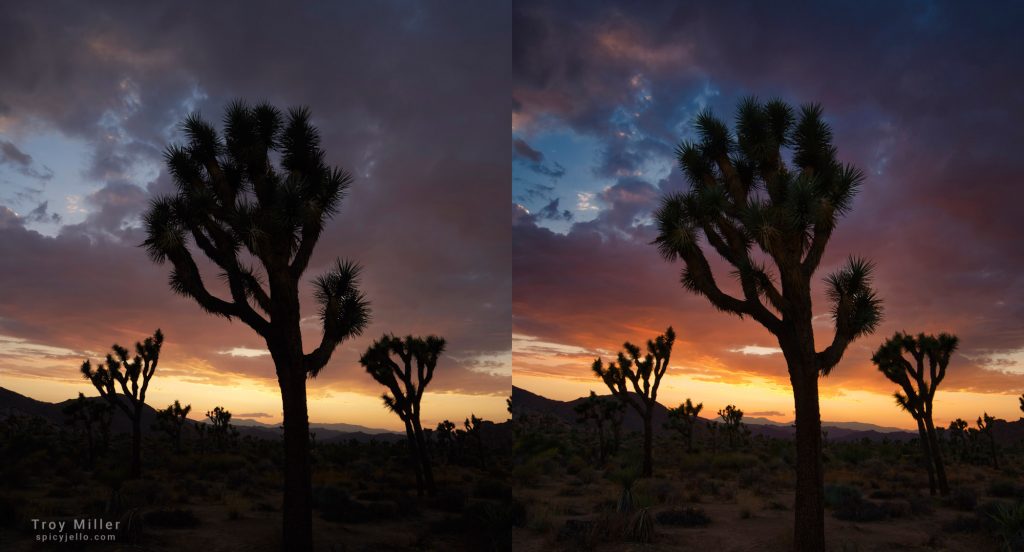
Dynamic range
Fantastic dynamic range and overall image quality every bit as good or better than the D850

Lightweight but not “tiny.”
If you are used to handling a D850 or D5, the Z7 will be comfortable but not feel small.

Native 24-70 is top notch
Right out of the box I was impressed. I have no intention to shoot resolution charts. With some hands-on experience and a few weddings in the can, I’m confident that the 24-70 is one of the sharpest lenses I have shot.

The active viewfinder is incredibly sharp and vibrant
Doesn’t feel like I’m looking at a screen at all. Nikon definitely got the viewfinder right.

The touchscreen is fantastic
I have the D850 with a touchscreen, but it’s not as fully functional. I use it more than I thought I would.

Focus tracking is fantastic
I was already used to facial lock focus tracking with the Sony and super glad to see it in the Z series.

Focus peaking—My favorite feature!
Again, used this in the Sony but it is fracking amazing.

Built-in focus stacking
Macro photographers rejoice LOL. The D850 has this feature, but the Z seems to handle it better.

Configurable lens ring
Although I don’t see a use for me, it’s cool that I can configure it.

Cons

XQD card
Although super fast, did we really need that? XQD cards are expensive and currently hard to find.

Single card slot
For me and probably many pros, this kills the Z as a primary camera for once in a lifetime kind of photography moments. I won’t trust my weddings to the Z as a primary camera. Families and engagements I will use the Z for sure, though.

Poor focus acquisition in soft low light
It makes me sad, but the Z will not acquire focus in extreme conditions like the D5 or D850. To be fair, if you don’t already rely on the extremely fast low light focus ability of the D5 or D850, you will be very impressed with the Z.

Wireless strobe control is LAME LAME LAME
Sorry, just had to get that out. To use the amazing SB-5000 strobes as a WiFi off-camera strobe, you have to plug this small module into the side of the camera. WTH? It’s in your way, nothing in place to make sure it doesn’t come out, and oh did I mention—It’s in the way!

Crippled button customization
Small thing to nitpick, but some custom options are not available to all customizable buttons, which feels to me like an oversight. Let the user decide what the buttons do, no ned to limit the options.

Battery life
Not a huge issue to be honest, but thought I’d mention it. The battery lasts about as long as the D850 but not nearly as long as the D5, so not a massive change for me. I have regularly gotten 500+ images out of my Z7 at a wedding.

Let’s talk image quality

I’ve been shooting a long time, way too long in fact, and when you have been shooting daily for over 25 years, you get a sense of what an image should look like. It’s not scientific by any means, but when you view a lot of images and primarily the same subject matter, you get a good sense of what a camera is giving you.

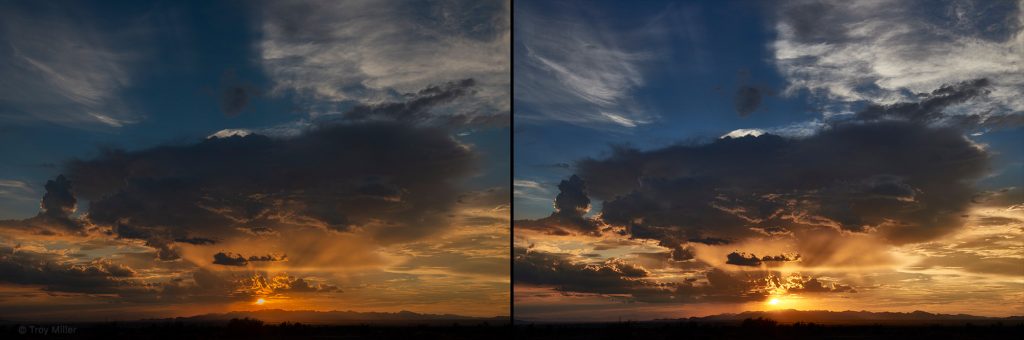
For example, the first time I shot with the Sony a7R II I was blown away by the exposure latitude over the Nikon D4 and D4s I had at the time. Then came the Nikon D850 which was also very impressive. Highlights in a bride’s dress or an overexposed sky are much more easily recovered in the D850 and the Sony a7R II than any other camera I have shot. Now enter the Z7. The Z7 is every bit the D850 and a little more, more specifically a little thicker on highlight and shadow detail. Again, this is not a head to head and not scientific, just my opinion with a lot of hands-on time. Having shot and edited as much as I have, I can tell what file I’m editing by how it behaves to the exposure slider or recovering highlights or shadows and the Z7 does not disappoint. What I think is most important is that the Z7 did not lack in image quality in any way. It held its own in a mix of D5, D850 and Sony a7R II files from several wedding shoots. For me, that says more than a pixel dive to compare images at monster magnification.

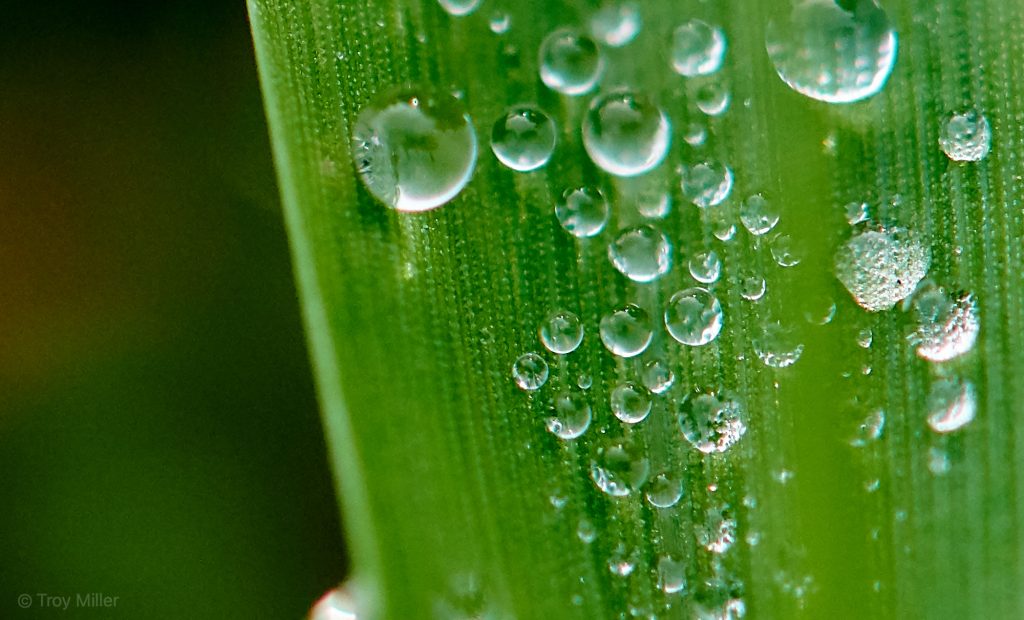
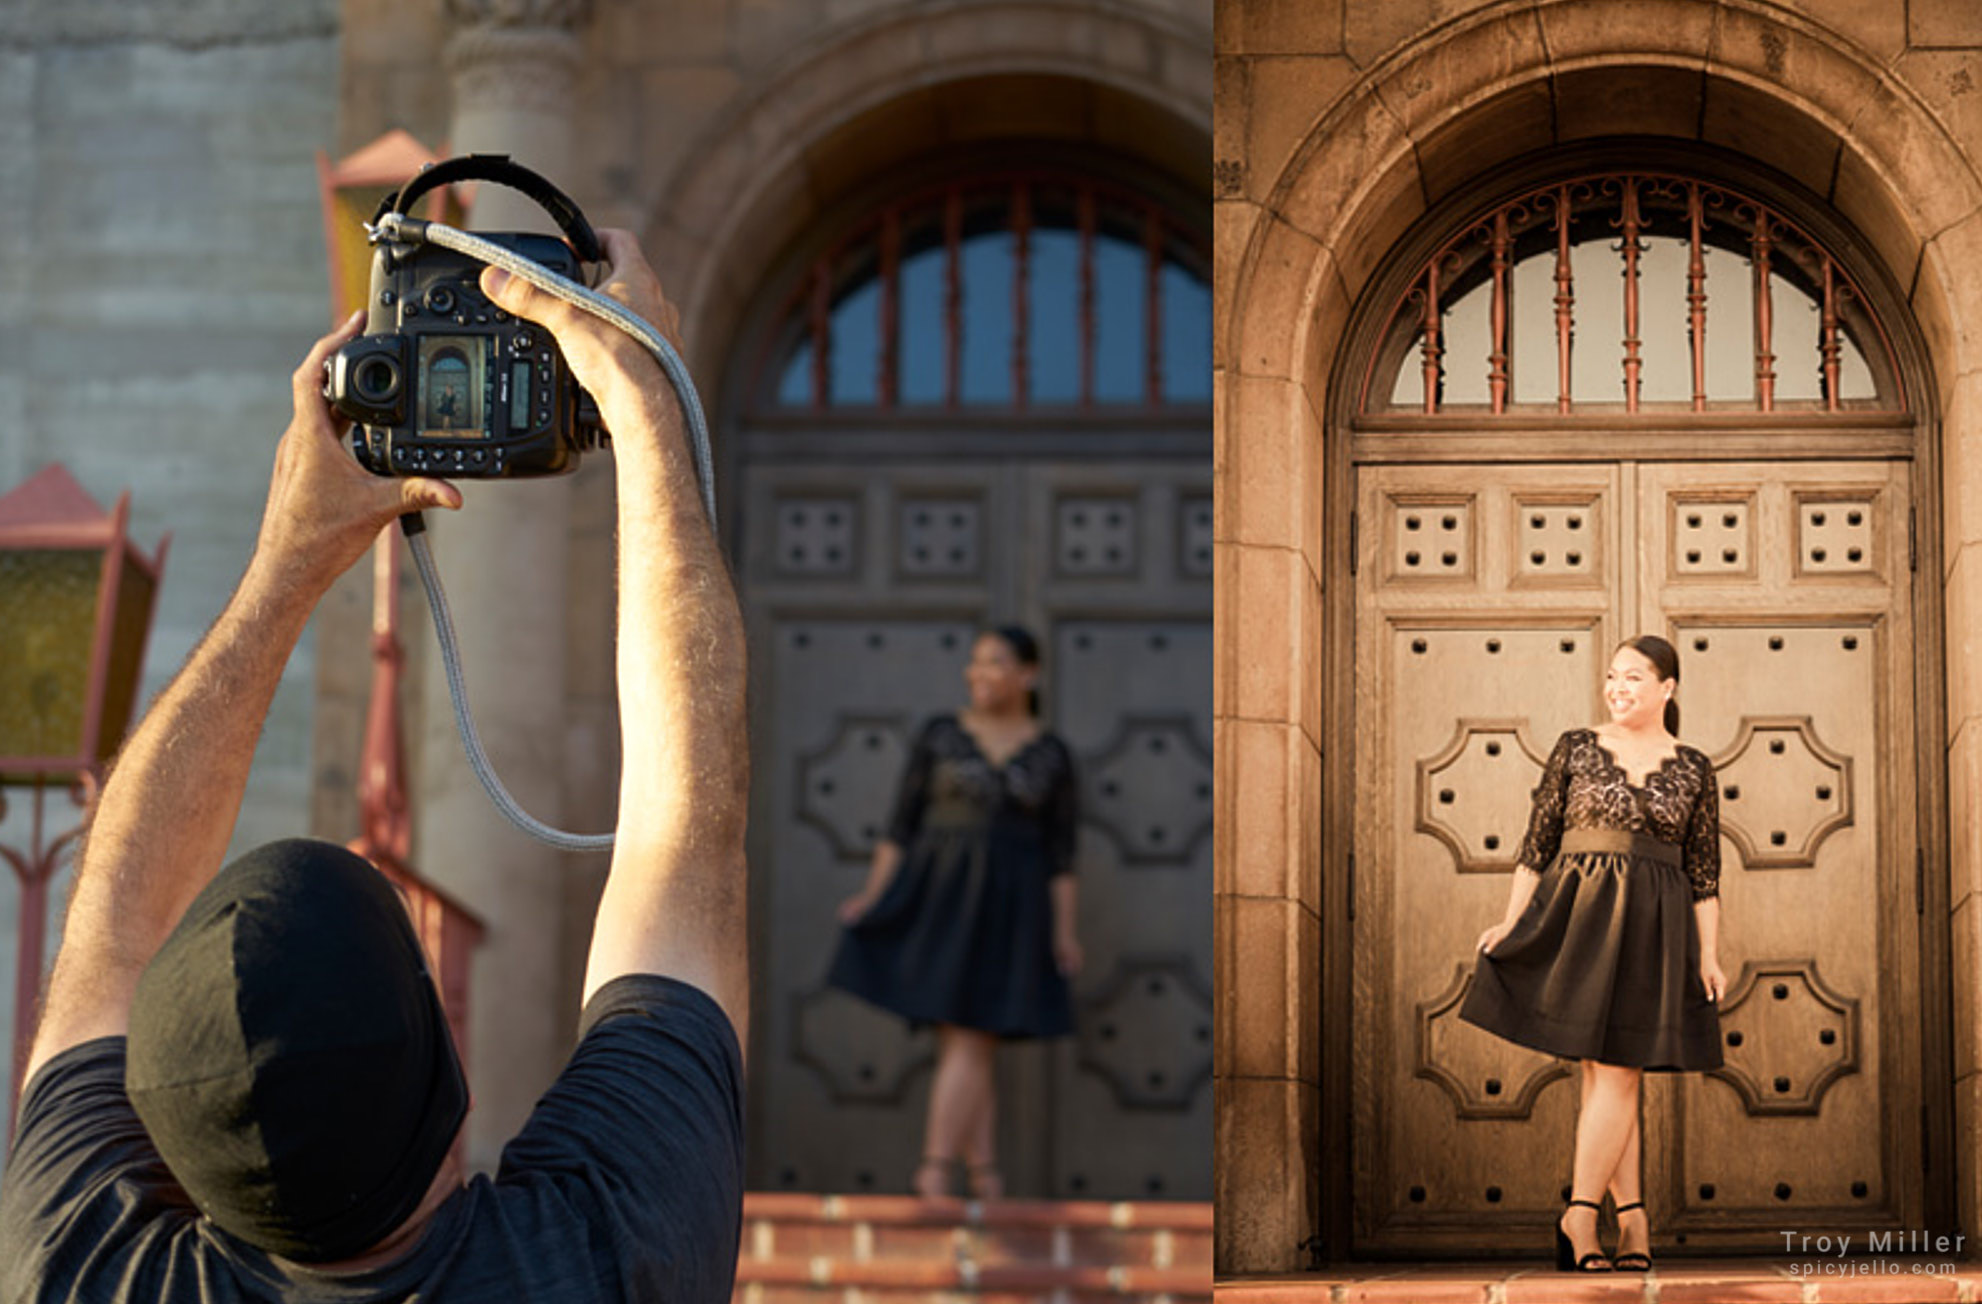
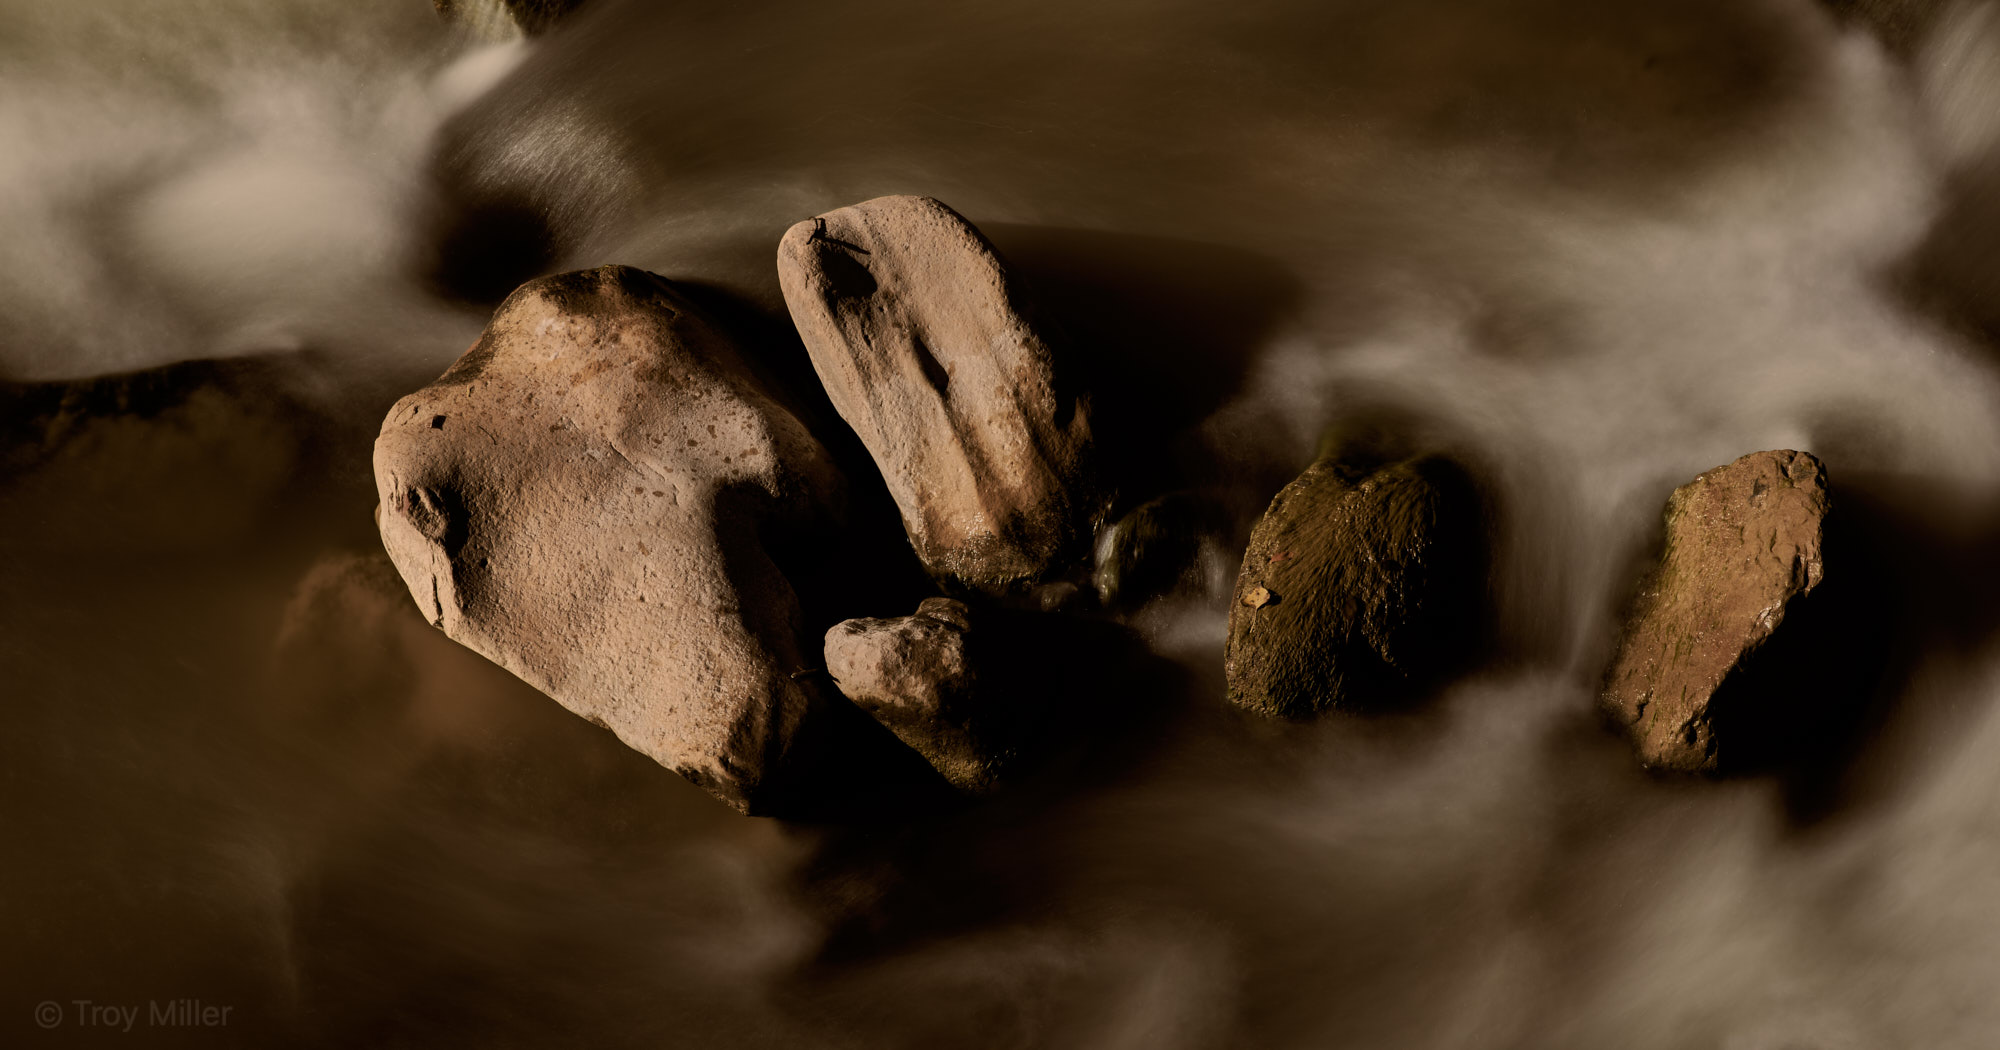
Nikon Z7: 1/400, F10, 1000iso, 105mm Nikon Macro, 100% magnification

Nikon Z7: 1/400, F10, 1000iso, 105mm Nikon Macro, Full Frame

Final thoughts

The take away for me is that the Nikon Z7 is a performer. No camera will ever be perfect, but for the moment the Z7 is pretty close. There will always be features or design elements we wish we had, but we need to be practical. Chasing gear doesn’t make me money or impress my brides—Getting the shot is what matters, and the Z7 can do that for me. Performance and the ability to make the necessary image for delivery is what matters most. If that gear can be a little lighter, faster, or sexier while doing its job, then all the better.

This post contains affiliate links. If you’d like to learn more, see my affiliate disclaimer here.

Nikon Z7
1 2 Next →

Recent Posts

  • Love, Engagement, and an Umbrella
  • Visualize the Masterpiece
  • From Brides to Post-Apocalyptic
  • Embracing Tough Lessons
  • Why I Love Aperture Priority

Recent Comments

  • How Much Camera is Enough? – Spicyjello Fine Art on Nikon Z7 and SpaceX
  • Spicyjello on Visualize the Masterpiece
  • James Peters on Visualize the Masterpiece
  • Spicyjello on Embracing Tough Lessons
  • Jeff Aadnesen on Embracing Tough Lessons

Archives

  • May 2025
  • April 2019
  • March 2019
  • February 2019
  • January 2019
  • December 2018
  • November 2018
  • October 2018

Categories

  • creativity
  • gear
  • Inspirtion
  • portraits
  • Printing
  • Software
  • Technique

Meta

  • Log in
  • Entries feed
  • Comments feed
  • WordPress.org

Prints for Purchase

All images posted here are available for purchase in a variety of sizes and methods from Premier Artists Collection, a gallery featuring select artwork by myself and other photographers throughout the globe. You can visit my collection to learn more.

All Images Copyright © Troy Miller. All rights reserved.