• Gallery
    • Fire
    • Ice
    • Water
    • Kelp
  • Thoughts
  • Resources
    • Custom Styles
    • Favorites
  • About
  • Contact
    • Schedule a Meeting
  • Gallery
    • Fire
    • Ice
    • Water
    • Kelp
  • Thoughts
  • Resources
    • Custom Styles
    • Favorites
  • About
  • Contact
    • Schedule a Meeting

Tag: Zion

March 16, 2019

| by Spicyjello

Visualize the Masterpiece

Posted in Inspirtion, Software, Technique

Understanding what you can accomplish with post-processing can make all the difference in your images

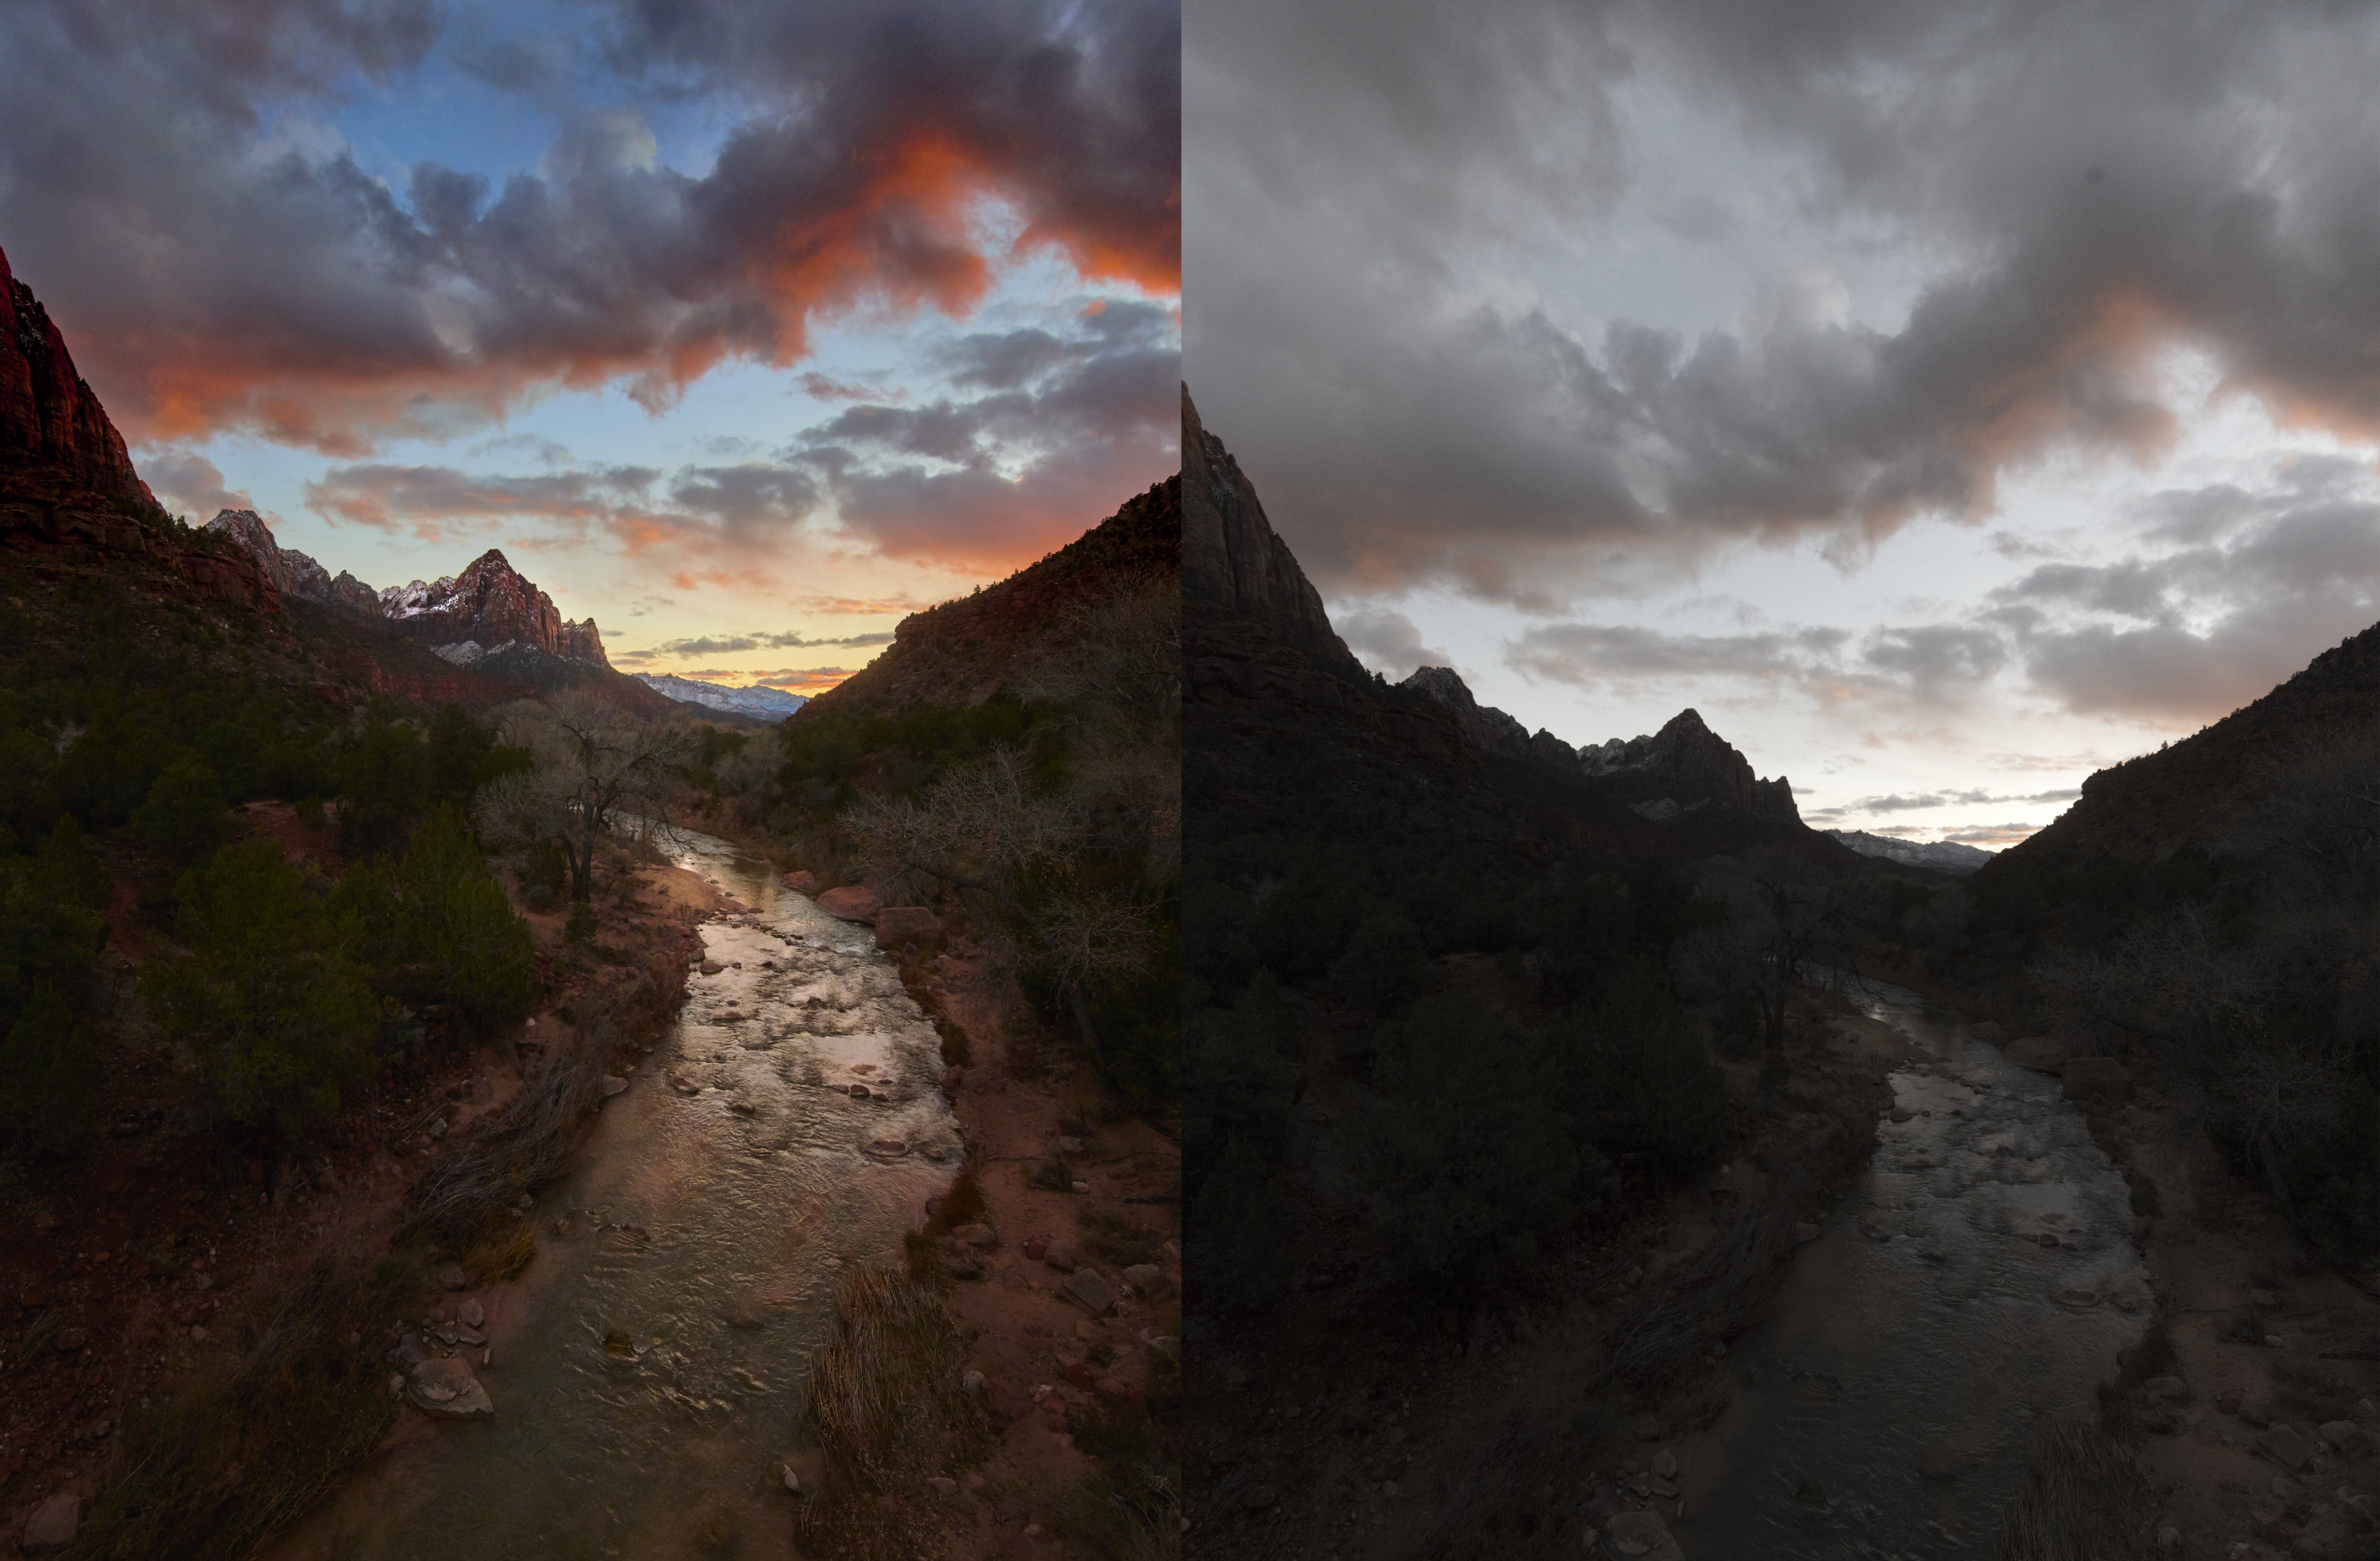
Looking at the featured image of this post (above), the image on the right was straight out of camera, and obviously, the image on the left was “tuned”. A side-by-side view is a testament to the amount of information that is contained in a RAW file and is something to keep in mind while processing. In this instance, the processed image is a more accurate rendition of the scene and best represents the way I experienced it.

So why the difference? Why not get the image perfect in camera?

When looking at any RAW file, keep in mind that what you see on your computer monitor is a visual translation representing only a small amount of data available in the file for viewing. RAW files contain an enormous amount of data that, for the most part, we never see unless we move a slider.

The image on the back of your camera is much the same. An engineer worked out for you, how “Faithful,” “Normal”, “Landscape”, or other profiles are supposed to look. The amount of saturation, sharpness, contrast, and other visual elements you see are nothing more than a single, narrow interpretation of your image. Until you get that image into a RAW editor like Capture One, Lightroom, Luminar, and so on, you’ll never see the depths of what that image contains.

In practice

For the image above, I chose to set my Nikon profiles to neutral so that I could see as much information in the highlights and shadows as possible. At the end of the day, I’m not interested in a pretty image on my camera display; it’s useless for the most part. Once that image hits my computer it doesn’t look the same as my camera preview anyway. Unless you are using the camera manufacture’s RAW editing software, almost nothing about the in-camera profiles or styles set in the camera will translate to the computer. For the most part, when bringing an image into your RAW editing workflow, you lose all of the color styles and keep exposure and white balance. From there, the look of your image is up to you. If you do choose to use the manufacture’s software so that your in-camera styles match the editing software, keep in mind that there is still an enormous amount of data in the image file that goes well beyond on what can be represented visually.

Before you take the shot

Prior to creating an image, take into consideration what your camera is capable of and understand the visual range of your files.

Also, take into account how you will edit your image to tell the story best as you see it. For example, imagine standing on a bridge in Zion National Park as the scene gets darker the sky becomes more beautifully lit. Before composing your image, you’ve already decided that you want to show the sky and the shadow detail of the river below. To get that end result, it’s crucial to understand how to get your image to a place that will more faithfully tell the story as you see it, while at the same time recognizing that the camera can’t see the same as your eyes—Being aware of this can often be the difference between a snapshot or a masterpiece.

Putting in the work

Ansel Adams once spoke about a concept by which you “visualize” the image fully in the mind’s eye before pressing the shutter; a concept that is just as meaningful today as it was when Ansel was shooting large format film in Yosemite nearly 100 years ago. The same discipline applies for Ansel as it does for us regardless of the screen on backs of our cameras. Without looking at the preview on the camera, we need to visualize the image fully in our minds with consideration to the process of how we edit, print and display our image.

Visualizing the final image before capture is a skill and discipline that takes time and practice. The more you exercise your mind, the easier previsualization will become. To help with this, know your gear and what your files are capable of. Don’t trust a podcast or technical article to tell you how good your gear is. Go do some tests for yourself. Photograph in the shade and try to predict what the image will look like before looking at the back of your camera. Intentially over and underexpose a series of images and try to recover any lost data in your RAW editor of chose. See what your camera is capable of, as not all cameras are created equal; some have less overexposure latitude while others reveal more noise if the shadows are opened too much. The software you use plays a huge factor as well. Take into account the enormous variety of cameras, sensors, and software—You have an unlimited array of possibilities for any image.

The full progression of the image

Shot on the Nikon Z7 and edited with Capture One Pro 12
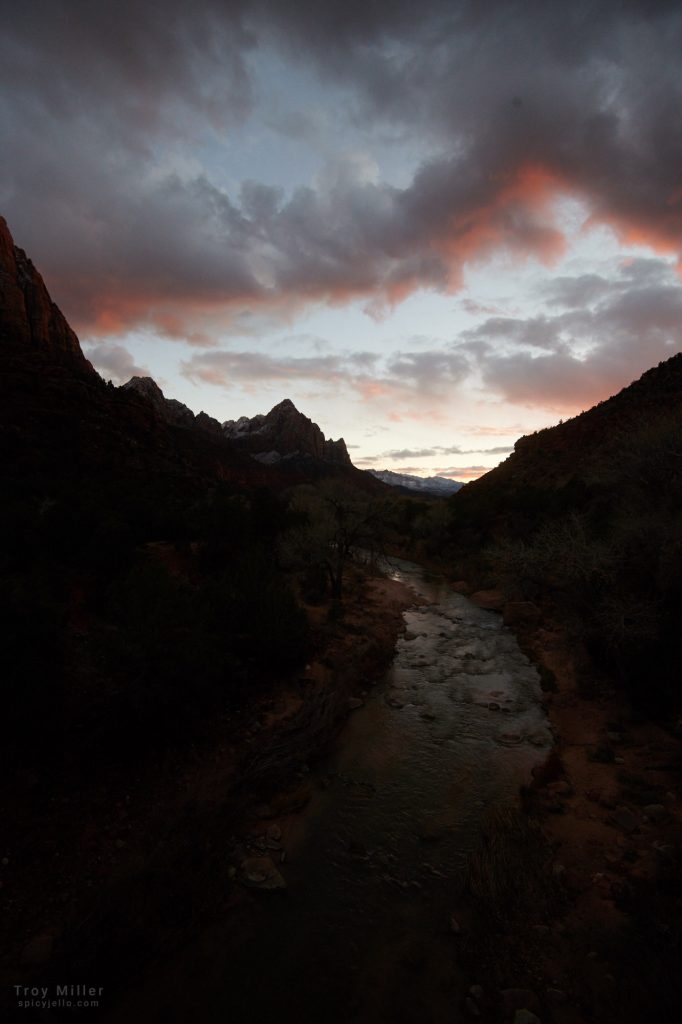
 

RAW out of camera


I cropped and Increased over all exposure, saturation and recover some highlights.


I darken the sky with a linear gradent. Also increased saturation and black point slightly.


Using the local adjustment tool. I lightned and increases the clarity of the water and The Watchman.


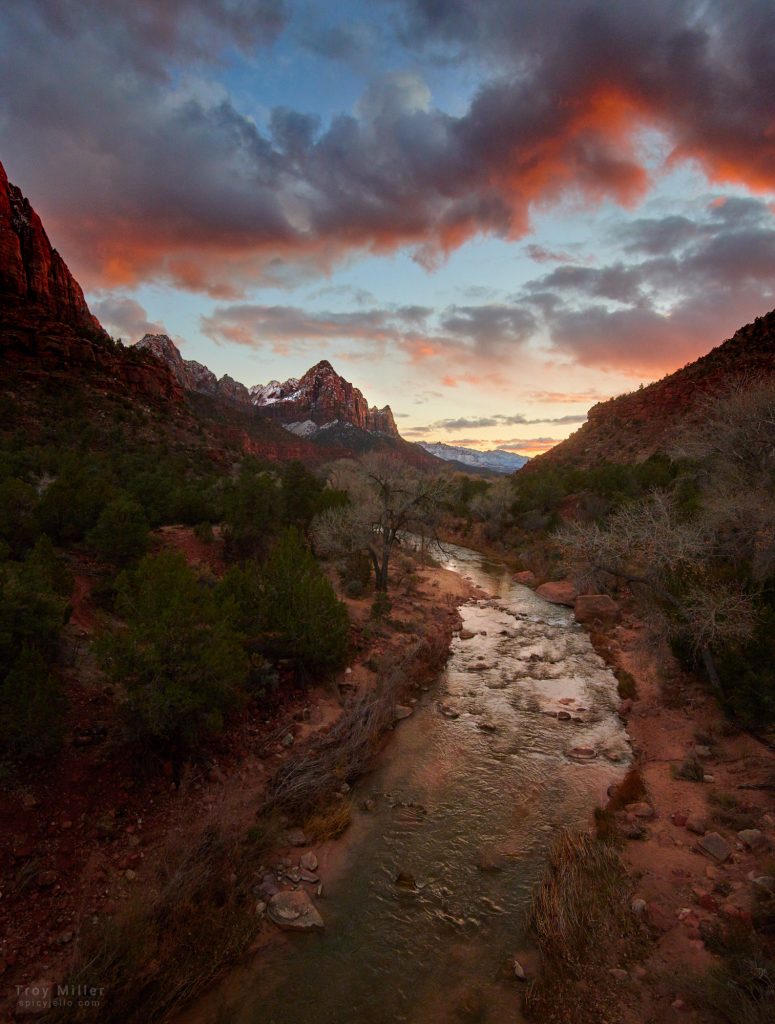
This is my final adjustment:
I used the brush tool to darken upper corners and the land next to the stream.
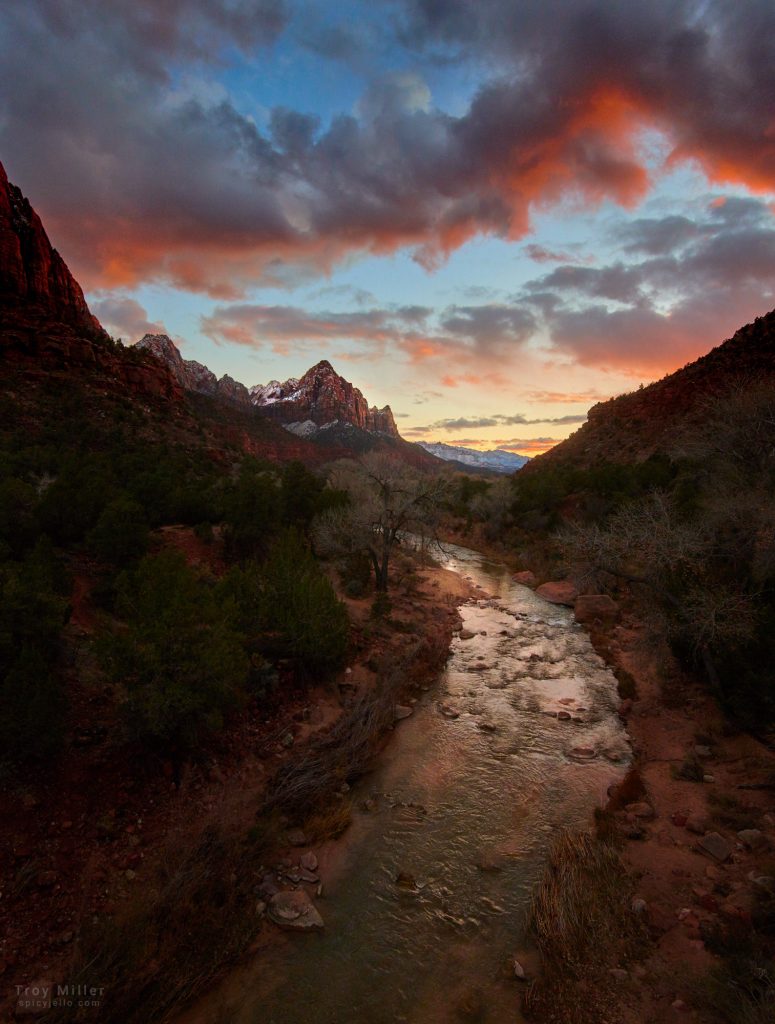
 

The results

For my Zion image of the Watchman above, I knew that as long as I didn’t overexpose the sky and kept even the slightest detail in the shadows, I had all of the info I needed. As I was pressed the shutter button, I knew just how I wanted to edit the image.

Like most skills in photography, the more you shoot and visualize your final image, the easier the process will become. At some point, visualizing will become second nature and you won’t think of it much anymore. You will simply shoot with a scene in mind and later, while editing, you will see the image as it should be and make it so.

Here is an interesting link with Ansel Adams speaking about the idea of visualizing.


This post contains affiliate links. If you’d like to learn more, see my affiliate disclaimer here.

Zion

December 9, 2018

| by Spicyjello

Why Infared is Awesome

Posted in creativity, gear
Zion Infrared pano shot with the Nikon Z6

Infrared: The other light.

Have you ever wanted to take a peek into a hidden world, another visual universe, or see the unseen? Well… you can with infrared photography.

With infrared photography, you see a spectrum of light just outside what our eyes can detect. It’s not the infrared you see in the movies though; you can’t see in the dark with a camera and not everything will be that cool, Matrix green. Although, with an infrared light source, you actually could see and photograph in total darkness if you wanted.

Infrared photography will allow you to see everything around you in a different light (pun intended)

My first encounter with infrared was with a friend of mine while we walked through the desert. I was shooting color and he was shooting infrared. I looked at the back of his camera and was blown away— It was black and white but new, amazing, and not something I could simply match by converting my images to black and white.

As a result, I quickly converted my Nikon D7000 and took a 3-week road trip to Washington. I expected to “test” the infrared on the trip and shoot with my other gear to capture most of the trip in color.  Well, that’s not what happened. Once I started to see the world in infrared, I never looked back. I shot 90% of my trip in infrared (aka 1000s of images). All of those fantastic mountains and lush rainforests—All infrared. Coastal lighthouses, small towns, and bridges—Definitely all infrared. It was amazing for me. I saw something entirely new, and it was exciting to say the least.

Infrared is impressive to me for a couple of different reasons

1. It’s unpredictable

First, I love black and white photography and I think everything looks best monochromatic. I spent countless hours early in my career agitating 35mm film in developer and then many more hours in the darkroom rocking a developer tray—So the monochromatic force is strong in me. Sure, I can convert and tweak a color image to black and white, but it’s normal, and everyone can do the same.

Infrared is different, challenging and unpredictable, Perfect!

For those of you that want more than a monochromatic experience, there is faux-color infrared. Depending on the conversion method and the amount of visual light allowed to hit the sensor, there can be an interesting duo color element to play with.

2. It’s unexpected

Another reason for my love of infrared is that it surprises me. I have been a professional photographer for just over 25 years at the time of writing this, so I’d say I’m good at seeing and using light. Infrared is just different enough that I can’t always predict how someone or something will look.

Although properly handled, infrared can produce some soft and unique skin tones. The real advantage of infrared is landscapes. Infrared changes everything. Skys go dark, trees, water reflections, pretty much everything changes. It’s like an additional layer just under the surface of what we are used to seeing, and for that reason, I LOVE Infrared.

Pro tip: People usually don’t look great, as their eyes go dark and their skin appears pale. It’s great for the Halloween season but not so great for brides and portraits.

How to get started

So, you ask, “what’s so different and how can it be better?” I hear ya. Who wants to take an expensive camera and make modifications? Besides me, that is LOL.

Here’s some examples of what you have to look forward to after taking the step of infared conversion:

But now that you’re convinced, what’s next? It all starts by converting a camera, which can cost between $300-$400. Don’t worry—Your converted camera can always be returned to mundane color, and the cost for converting back is usually much less than the original conversion. I won’t go into the technical details here; you can contact my favorite conversion experts at Spencer’s Camera. They will guide you and answer all of your technical questions. They also have a very informative website full of images and additional articles—Well worth having a look.

Choosing the details

When looking for a body to convert, I’d say a mirrorless camera is best, and my most recent and favorite conversion preference is the 590nm. This conversion allows in additional visual light which will enable me to tweak and play a little more with the colors and conversion to black and white.

A bonus of a mirrorless camera is the active viewfinder, whic makes shooting much easier. Otherwise, use a camera that can shoot and focus via live view to eliminate the need to calibrate a lens.

Keep in mind: Infrared light does not focus properly when being bounced in a DSLR if you don’t have a properly calibrated lens. Everything will be slightly out of focus as a result.

Post processing

Once you have a converted camera and filled a memory card with infrared amazingness, processing your images will be the next big step. If you shoot RAW (and you do only shoot RAW right?) then your images will be very magenta/red, like this:

A simple conversion to black and white will get you started on your journey to infrared bliss. Keep in mind, though, that there are colors in that image. On elements such as skies or grass, try using the white balance eyedropper in Lightroom, Capture One, Luminar, or whatever raw editor you prefer, before converting to black and white. The white balance can have a pretty dramatic effect.

Now you’re ready to play

Now that you’ve got your infared converted camera and post-processing methods figured out, it’s time to walk outside and point your camera at everything. Pine trees and succulents will glow even in the shade. Oak trees, not so much. Blue skies with clouds are amazing, and water is always a surprise. If you like to photograph people, give it a go and don’t stop playing.

If you would like to see me do some infrared editing, checkout this “Watch Me Work” episode on ThisWeekInPhoto.com

Now that you’re excited and ready to make the leap or perhaps do more research, I have some assistance for you. Check out the fantastic humans at Spencer’s Camera where I do all my conversions and those of all my friends. I’m a longtime customer and am not endorsed by them in any way. I truly recommend them.

When I picked up my recently converted Nikon Z6, I mentioned to them that I wanted to write an infrared post and they gracously offered a coupon code that I could include for all you amazing people.

Use the code spicyjello25 for $25 off anything over $200.

May you have a wonderful time exploring your infrared world!


This post contains affiliate links. If you’d like to learn more, see my affiliate disclaimer.

If you would like to support the efforst of this site, simply shop at Amazon using this link.

infraredZion

All Images Copyright © Troy Miller. All rights reserved.